The maintenance instructions listed below are basically those recommended by the manufacturer. They are supplemented by additional maintenance tasks which, through practical experience, the author recommends should be carried out at the intervals suggested.
The additional tasks are indicated by an asterisk, and are primarily of a preventative nature in that they will assist in eliminating the unexpected failure of a component due to fair wear and tear.
The levels of the engine oil, radiator cooling water, windscreen washer water, and the battery electrolyte, should be checked weekly, or more frequently if experience dictates this necessary. If not checked at home it is advantageous to regularly use the same garage for this work.
Maintenance Task
Every 3,000 Miles
1. Where the car is used for much town-work involving much stop/start driving; in very cold conditions; and in hot dusty conditions; run the engine until it has reached its normal working temperature. Then drain the oil from the sump/gearbox casing and wipe the magnetic drain plug clean. Refill with 71/2 pints of a recommended 20W-50 oil in summer, and a 10W-30 oil in winter.
2. Fill a grease gun with Castrolease L.M. or a similar recommended multi purpose grease and thoroughly lubricate the following through the appropriate grease nipple, which should first be wiped clean. Give 3- 4 strokes of the grease gun to:-
- Steering tie-rod ball joints: one nipple on each shaft.. These nipples are found on early models only (total 2).
- Inner drive shaft sliding joints: one nipple on each shaft. These nipples are found on early models only (total 2).
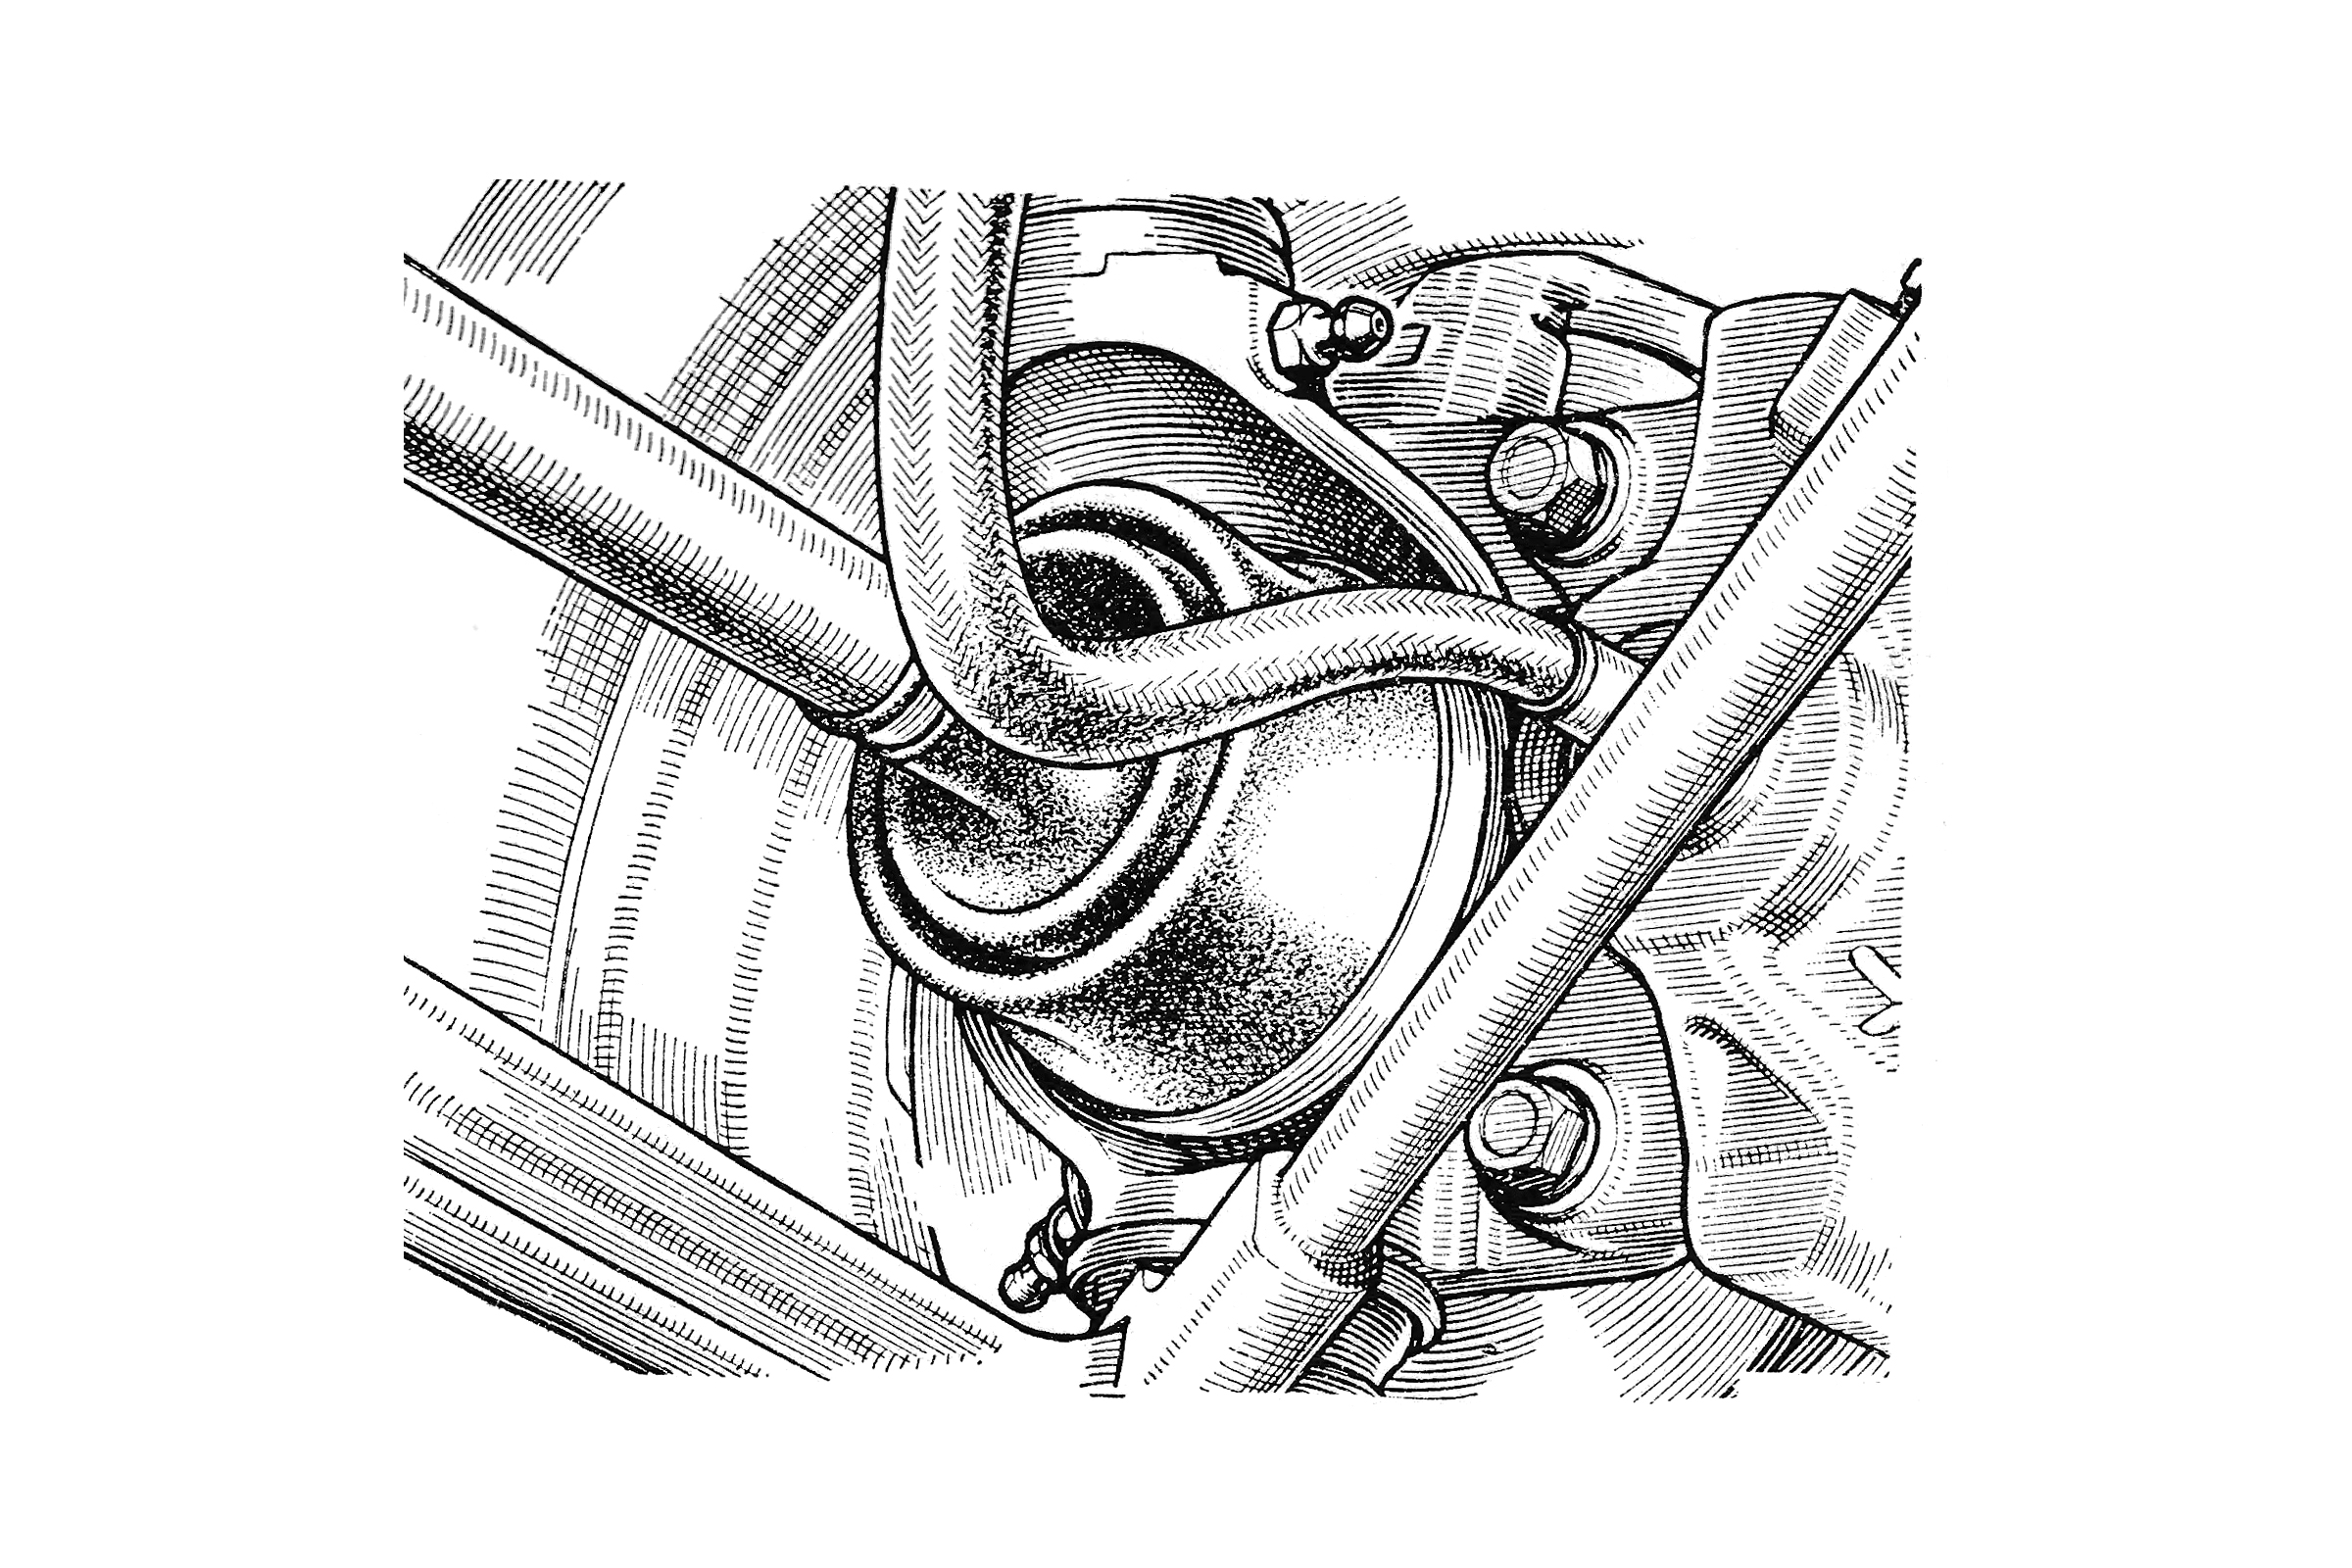
- Steering swivel knuckle. Two nipples, one upper and one lower on each side (total 4).
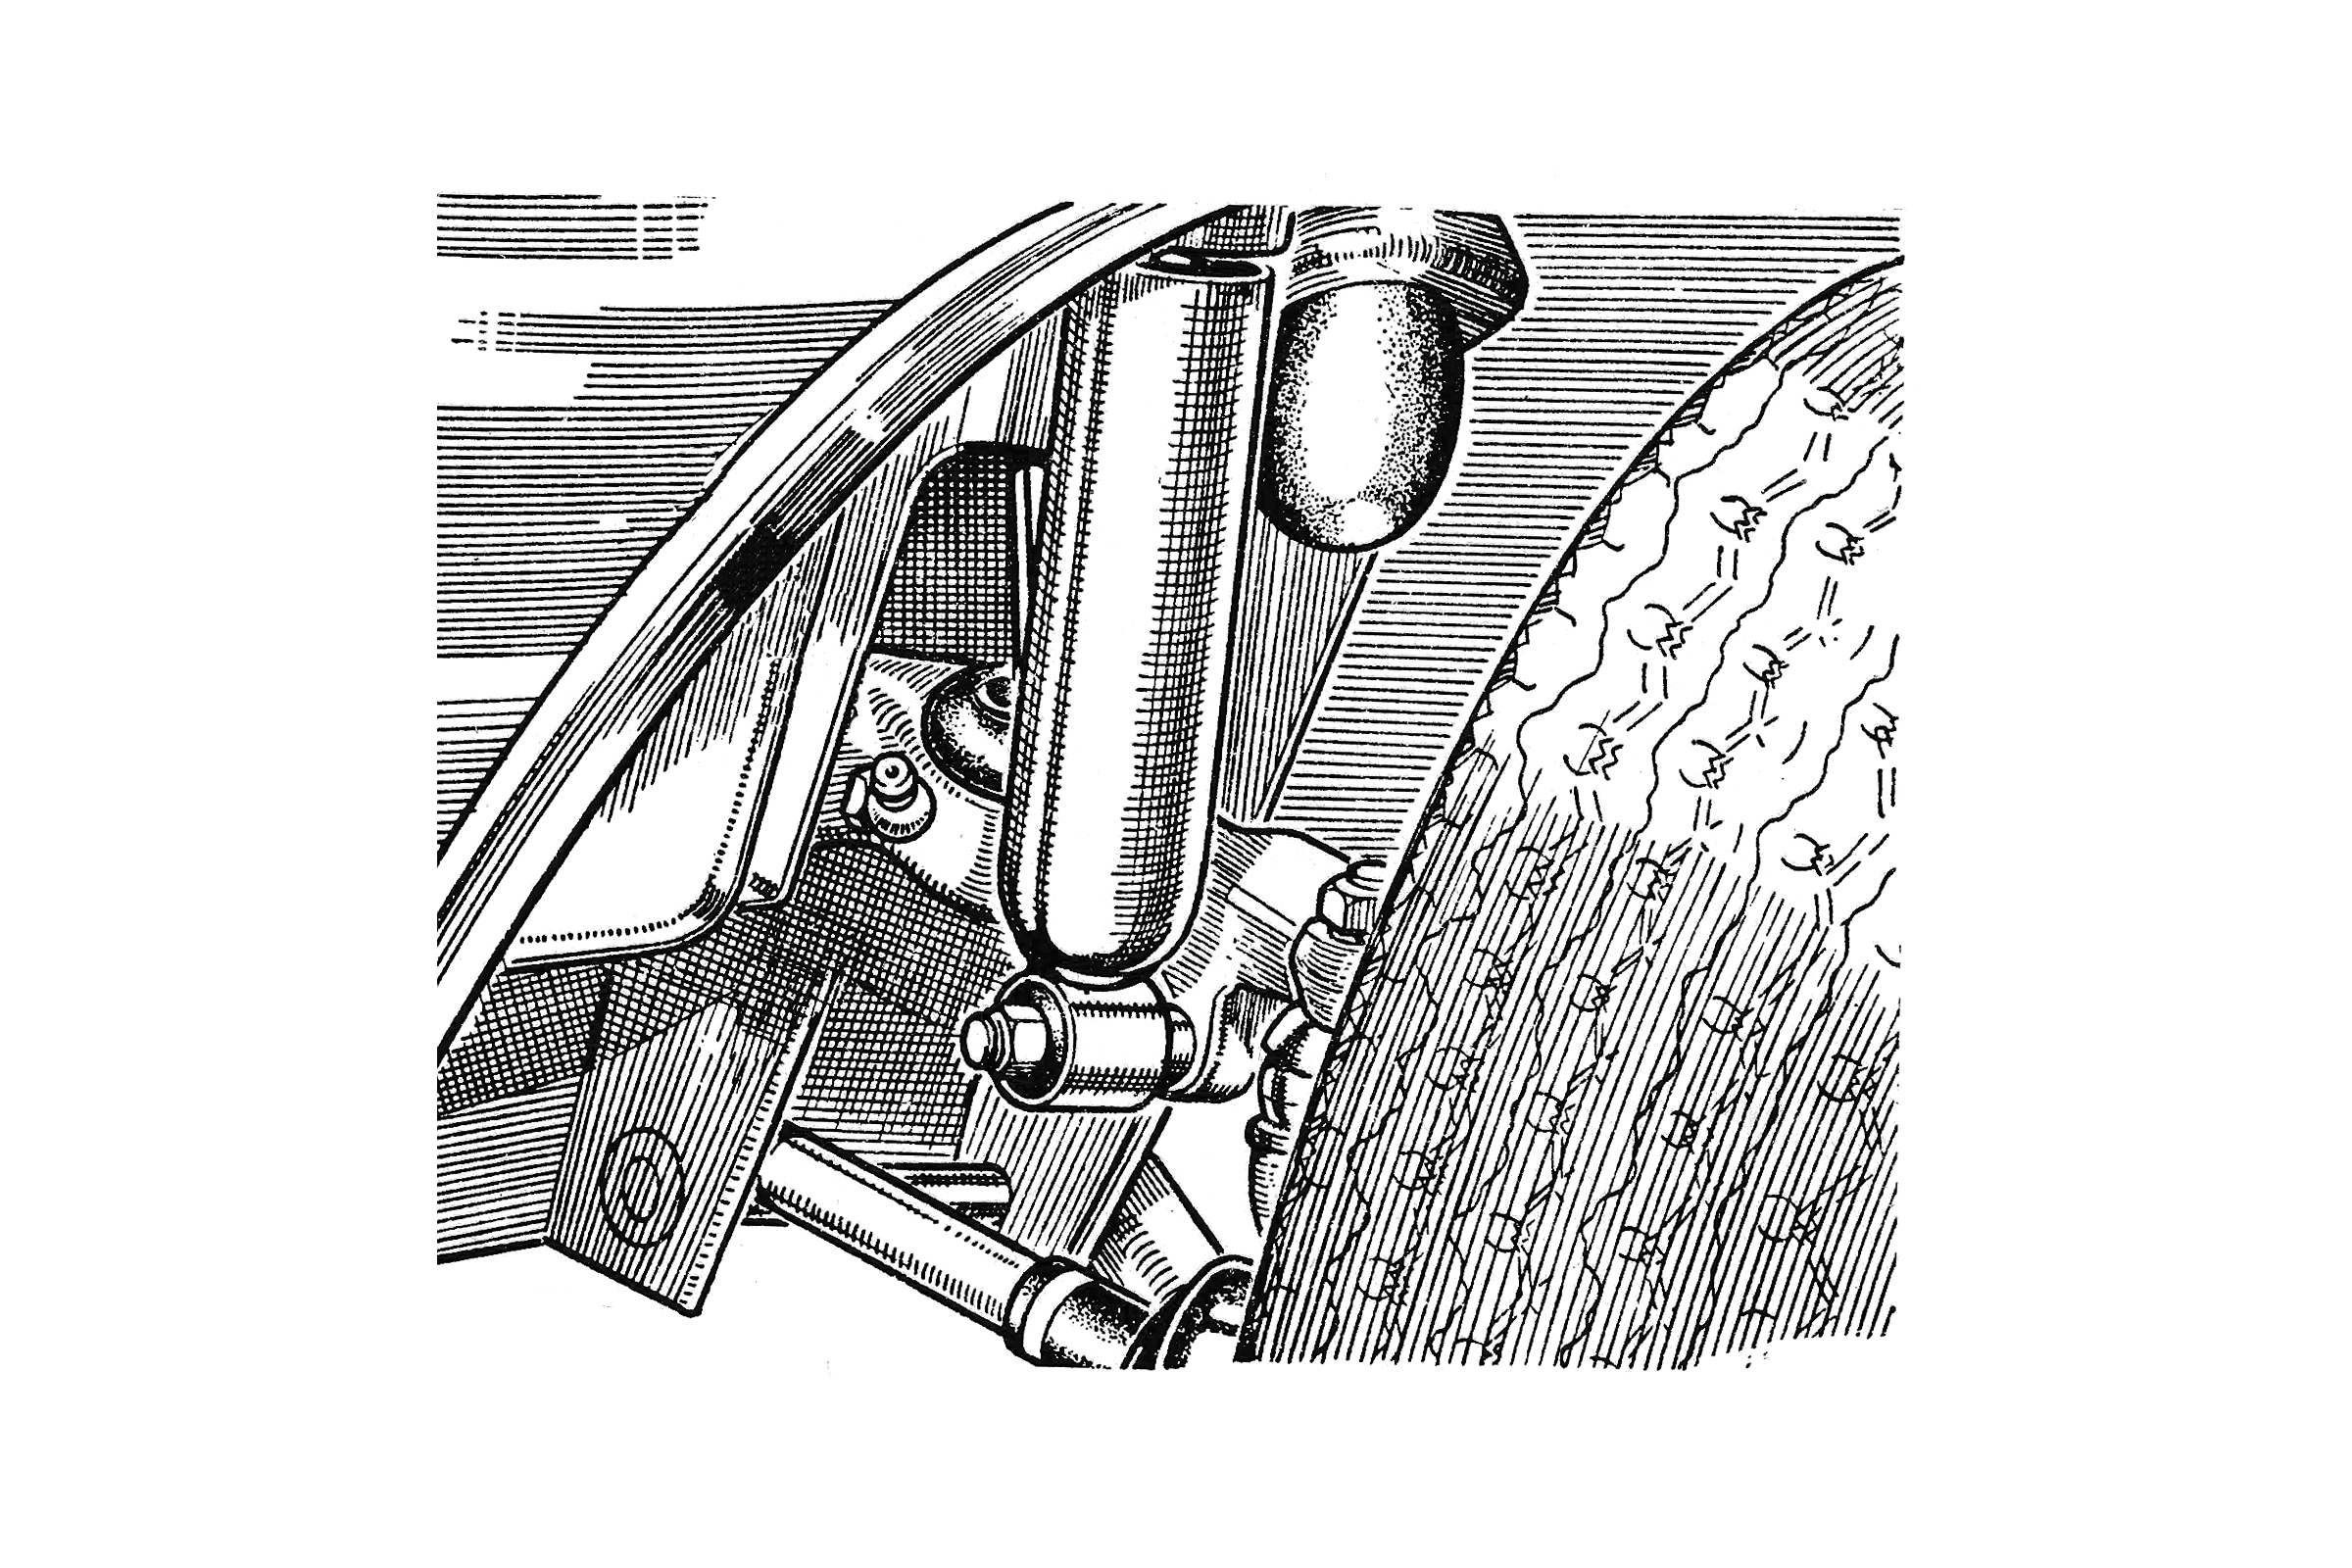
- Upper suspension arm inner pivot: one nipple on each arm (total 2).
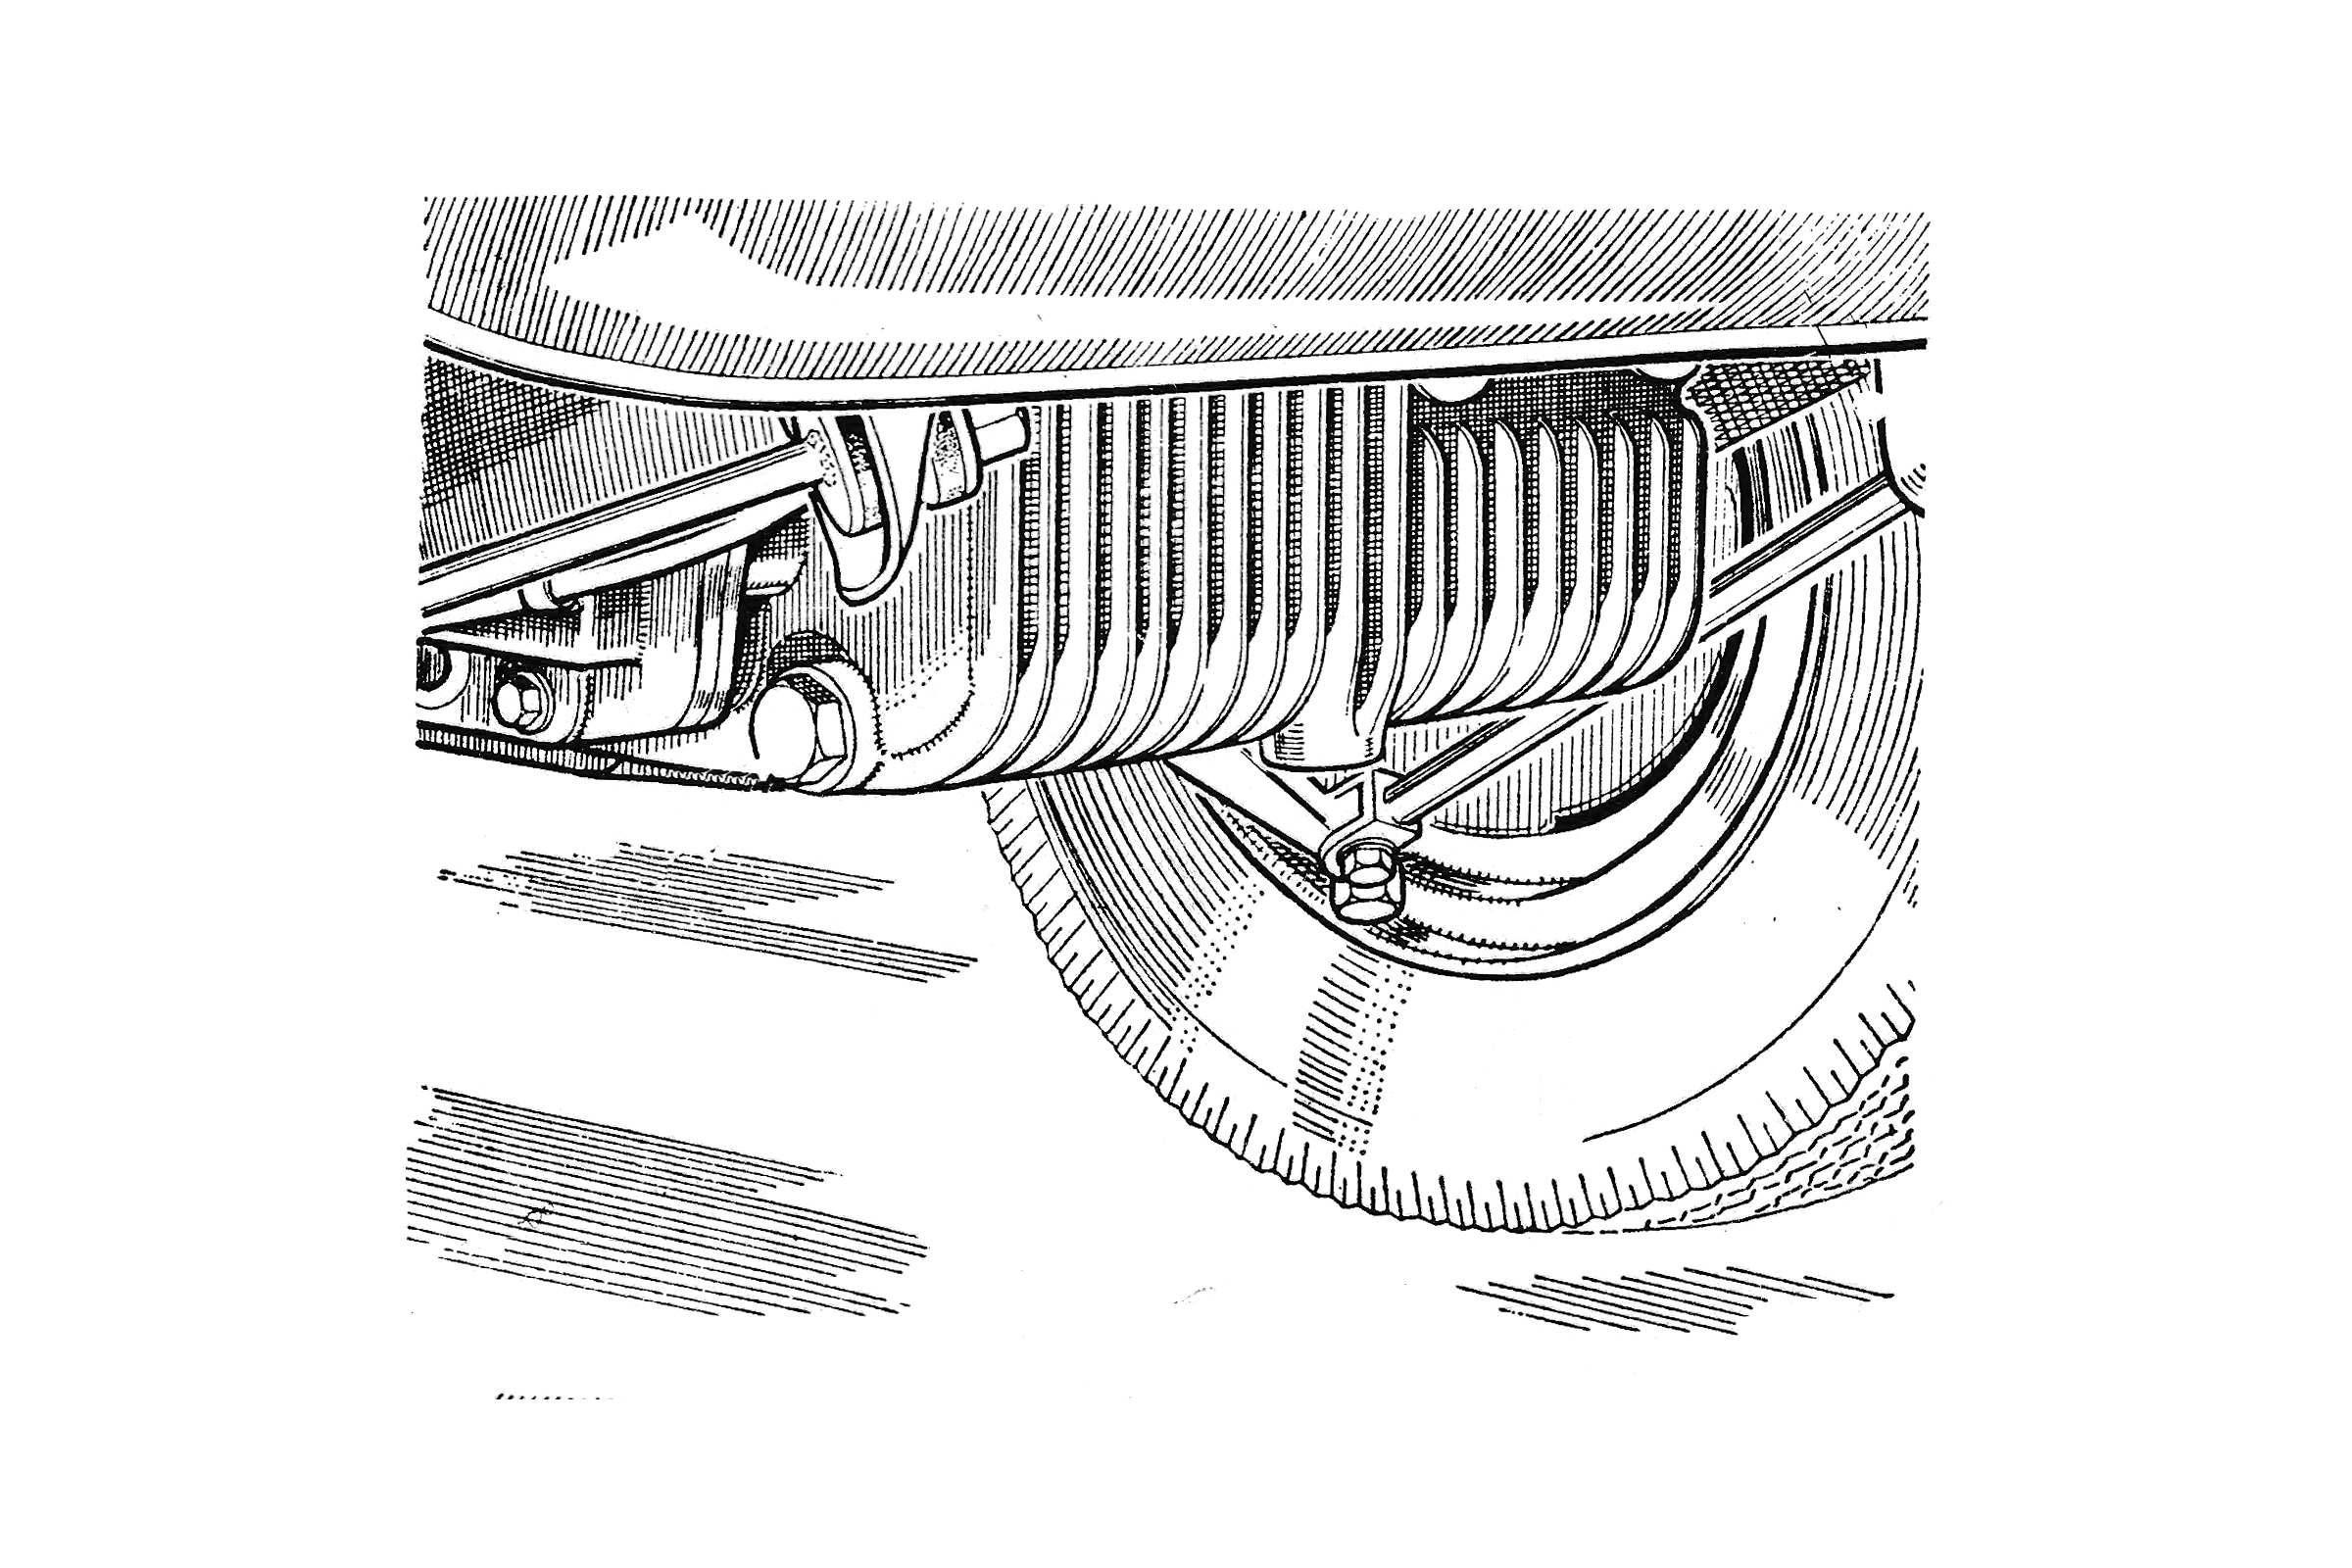
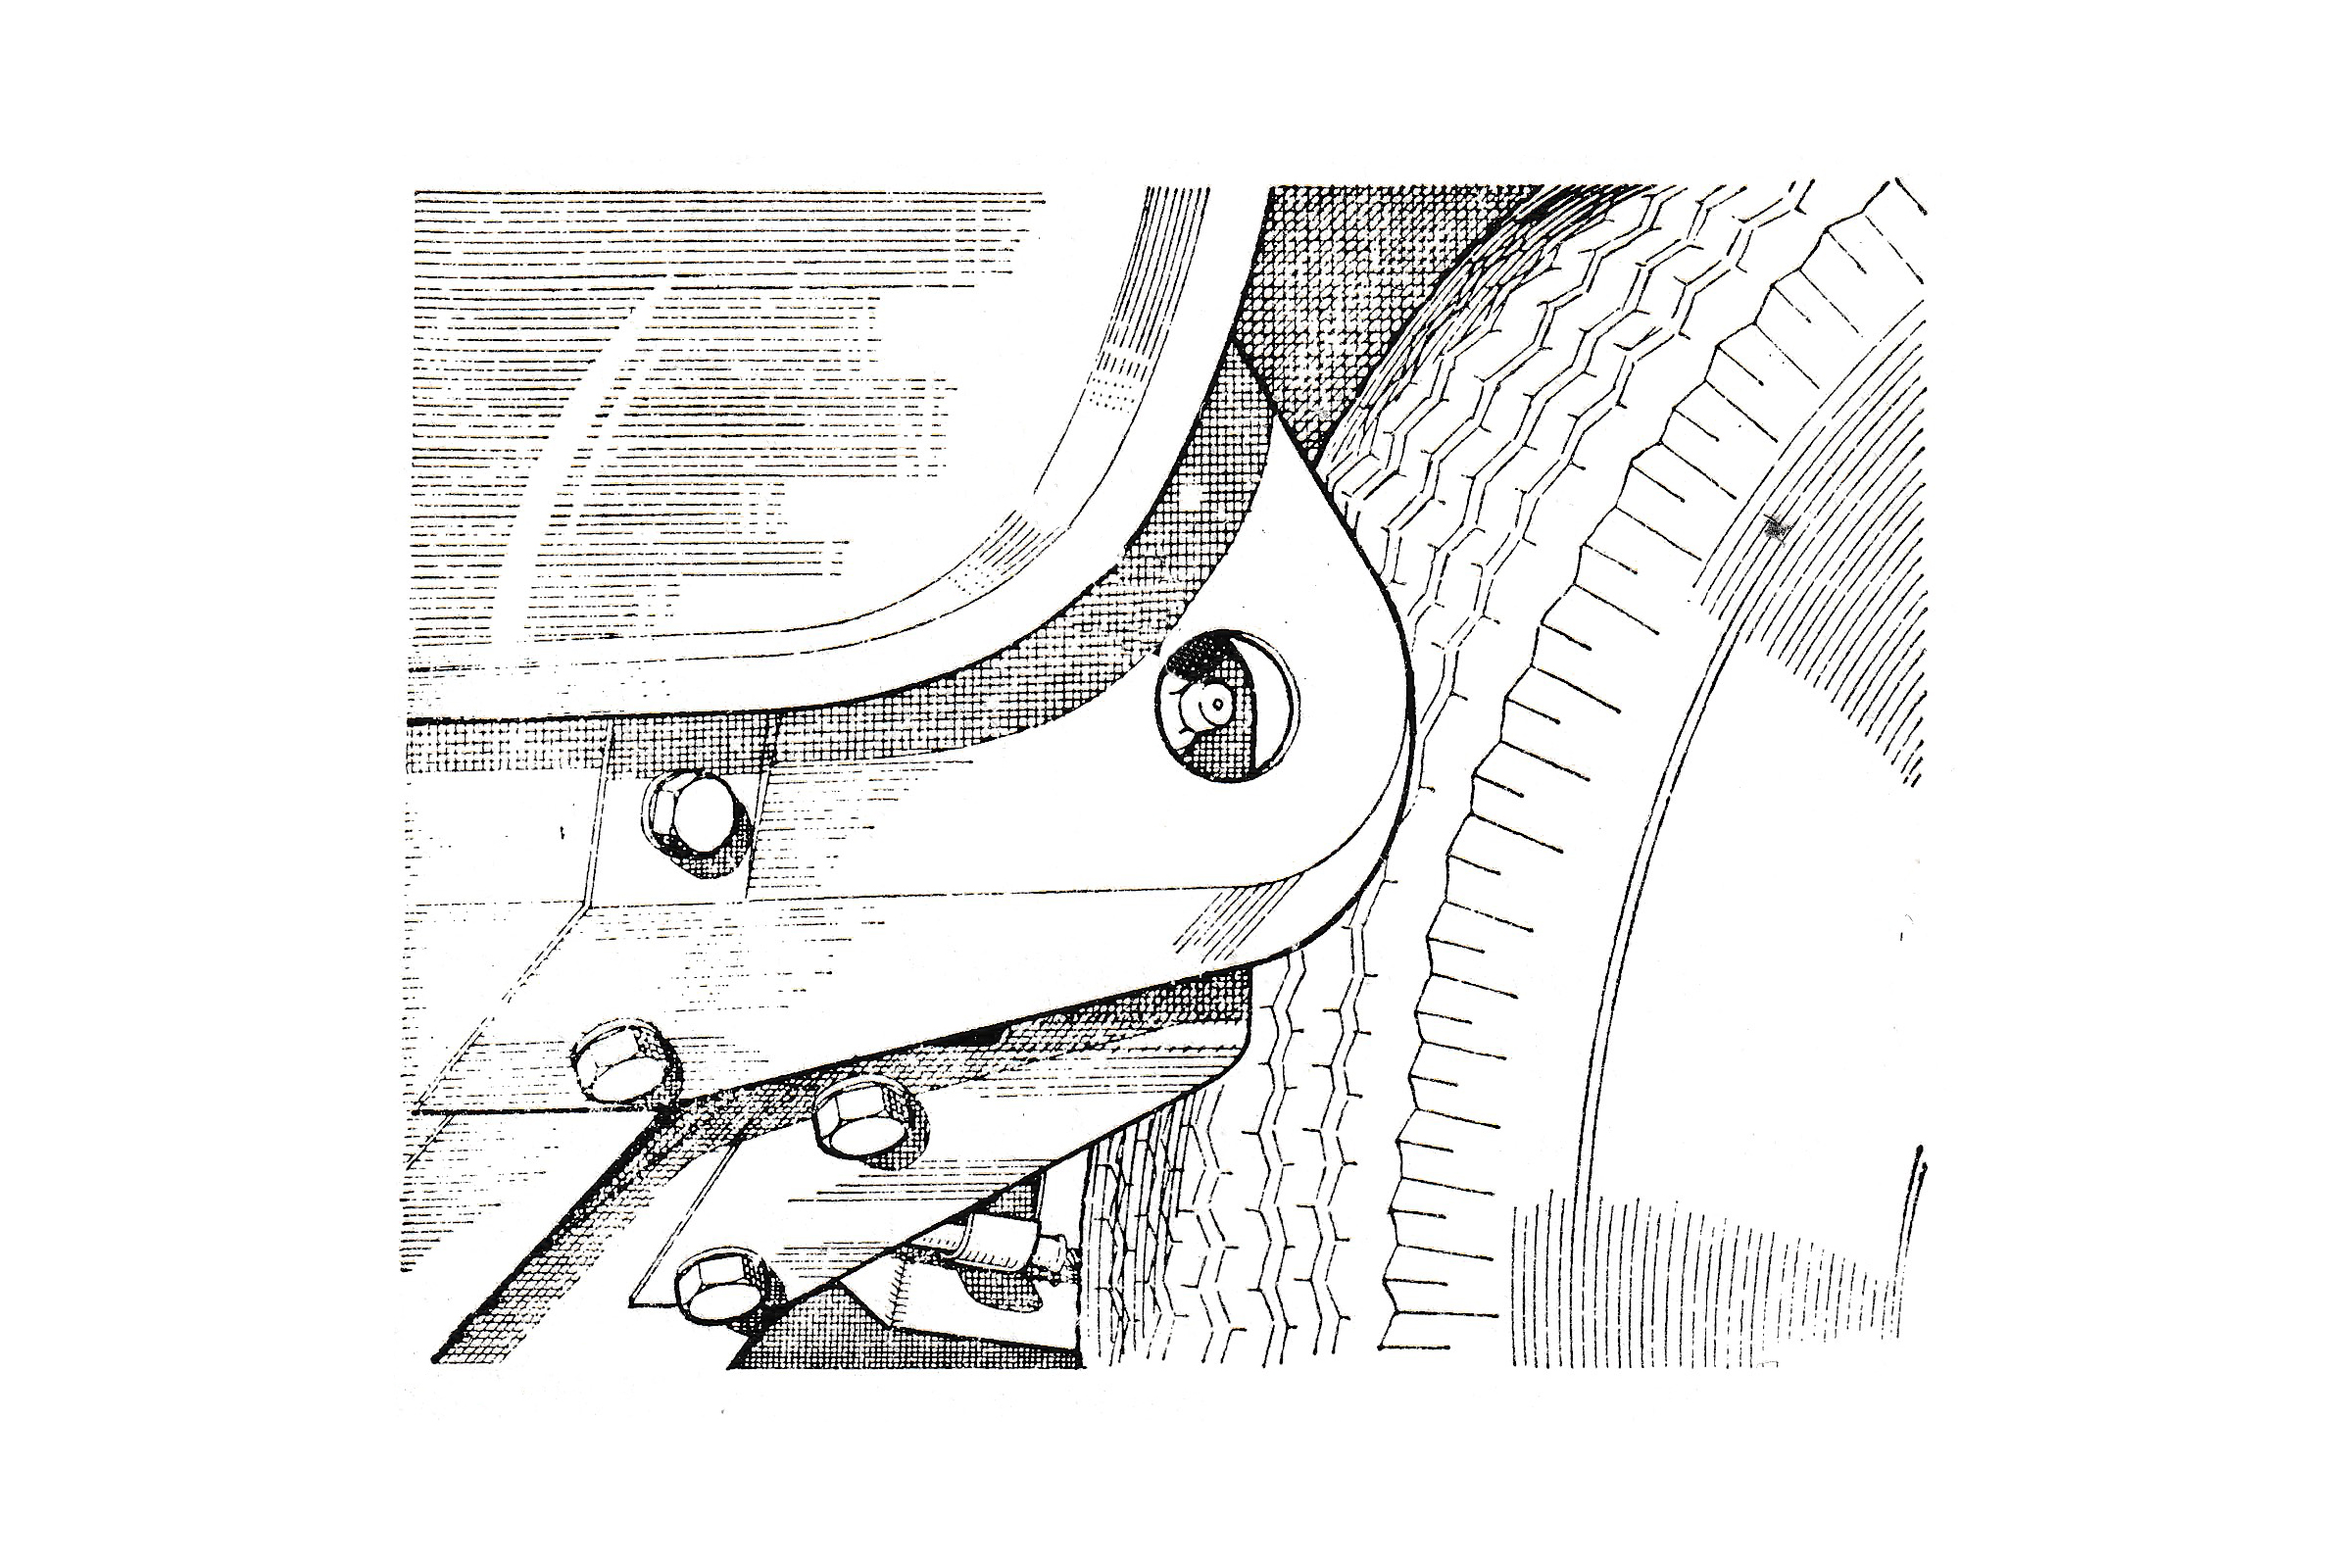
- Rear suspension radius arm pivot: one nipple on each arm. To expose the nipples remove the rubber blanking plugs.
1) Handbrake cable swivel pivot on the underside of the rear radius arm pivot. No grease nipple is fitted but cover generously with grease to ensure smooth operation.
Handbrake cable guide channels located at the rear of the exhaust pipe tunnel. Grease each channel generously (No grease nipple fitted).
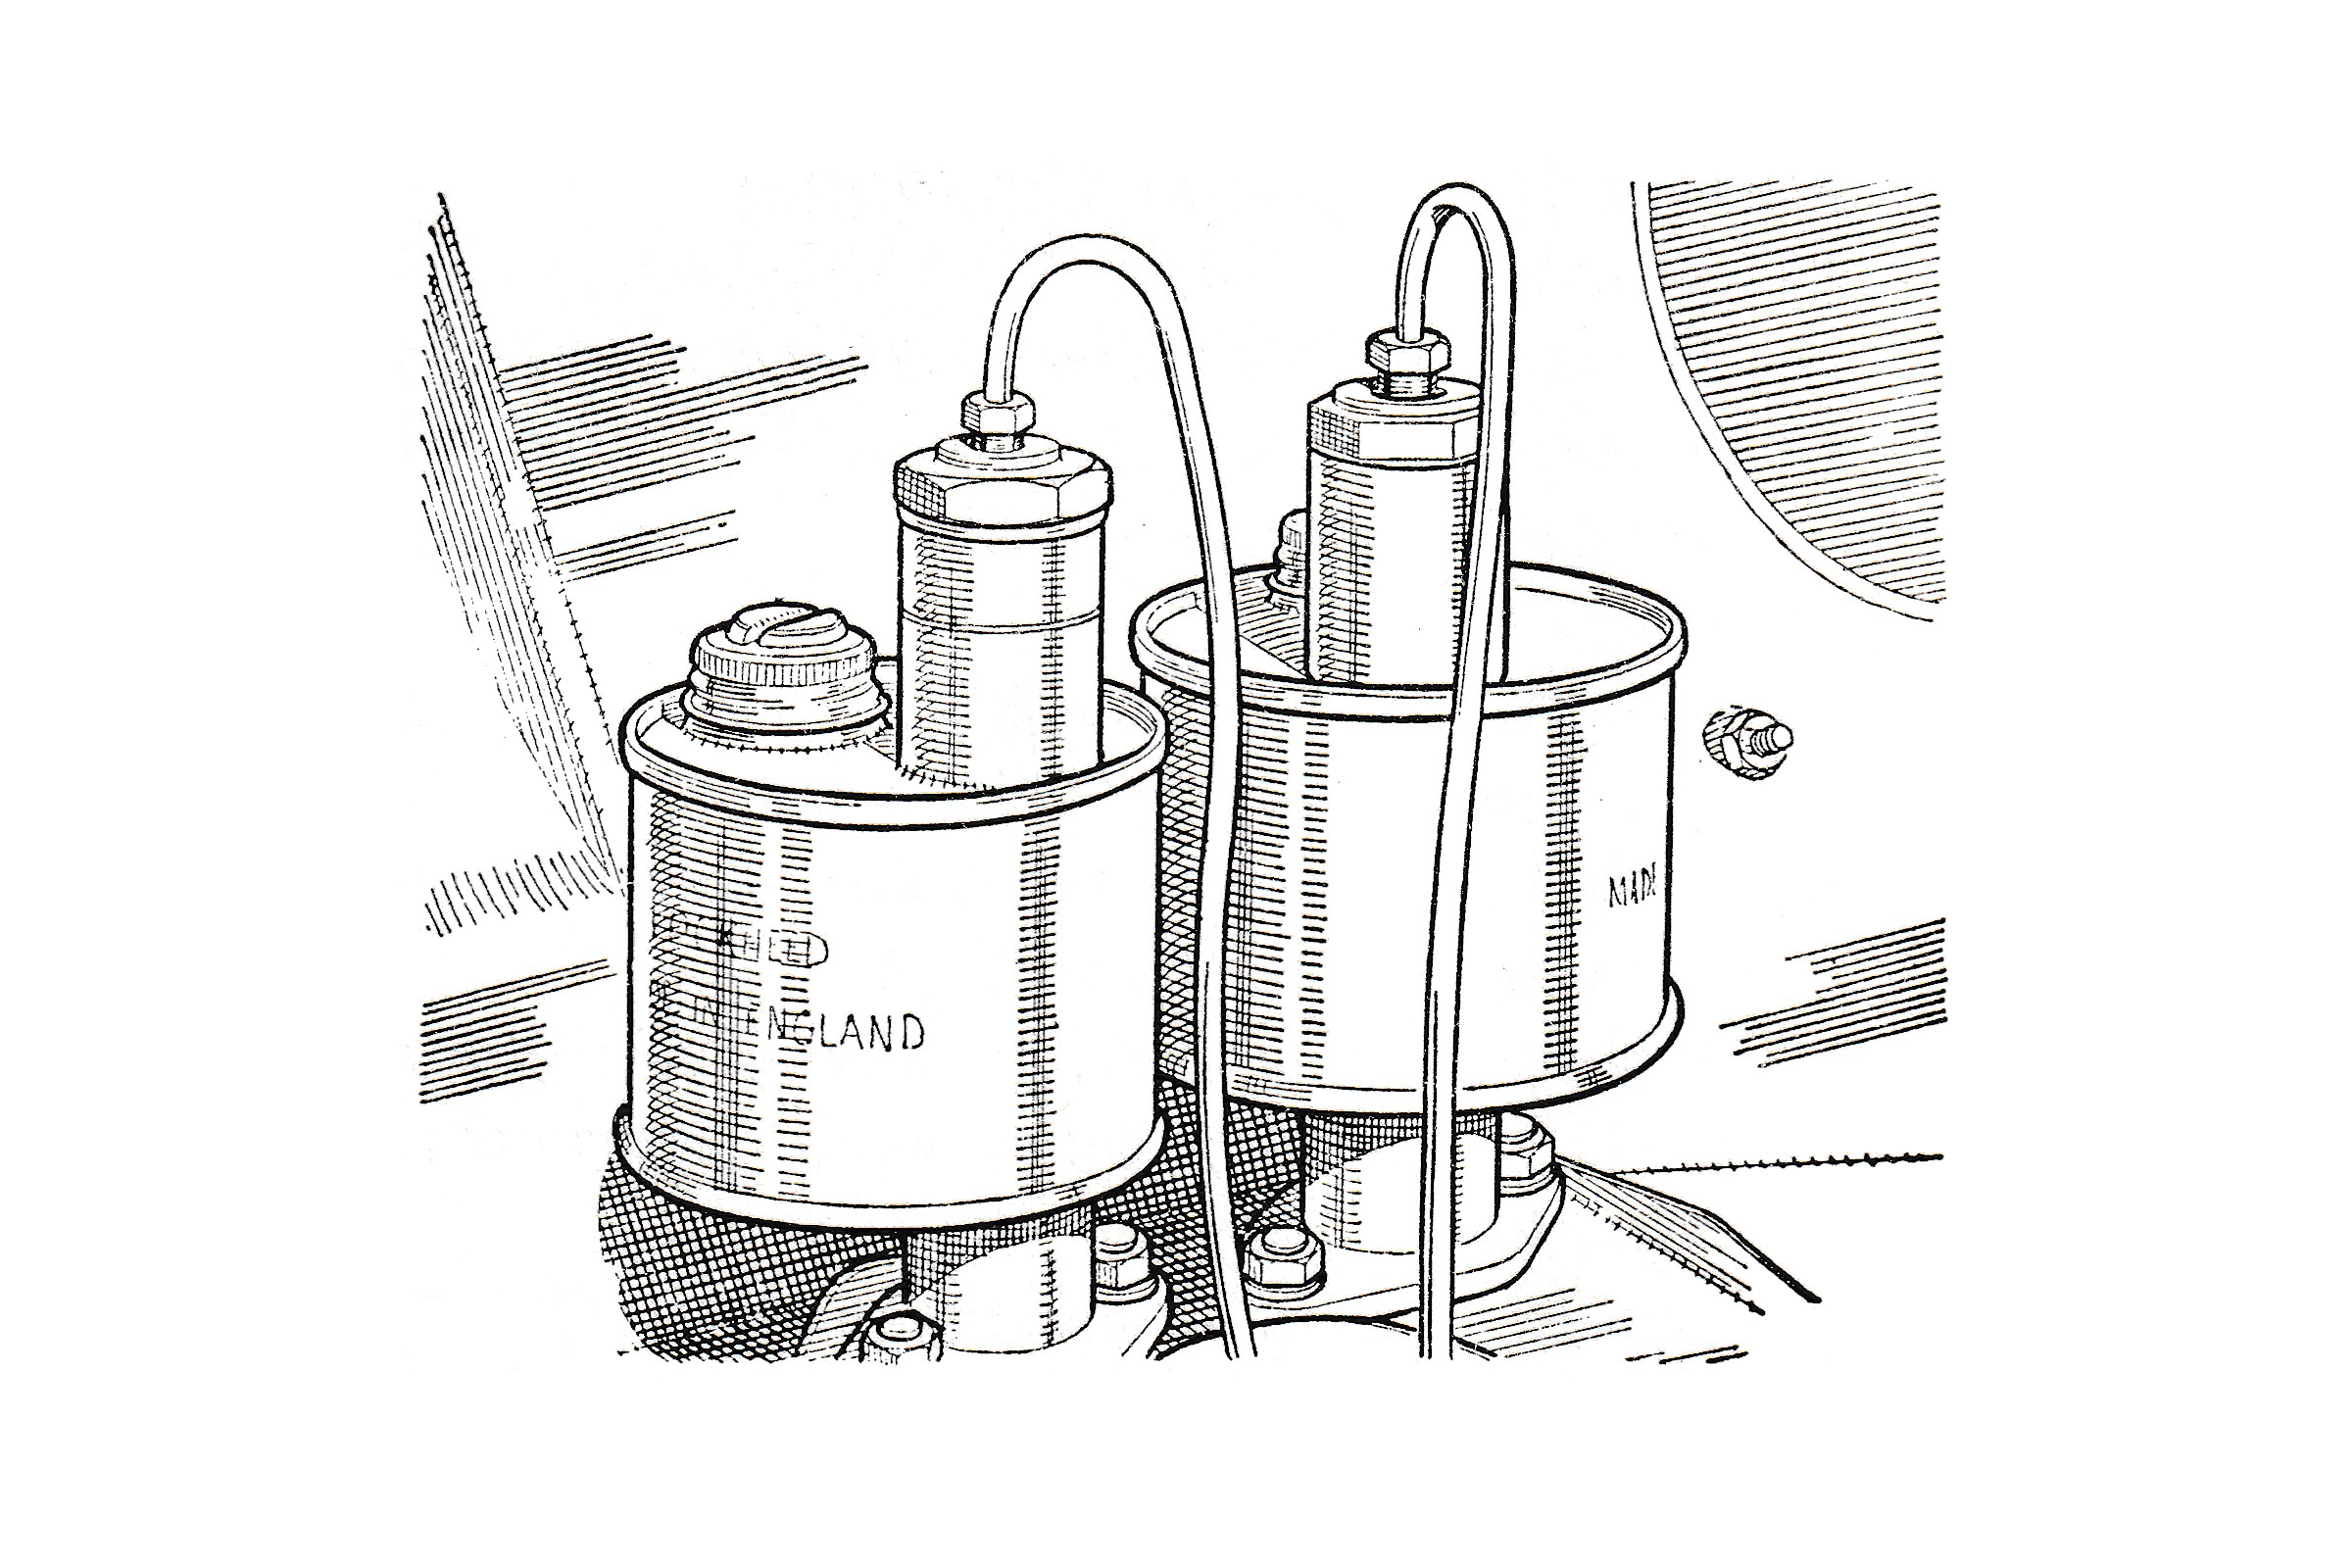
3. Unscrew the tops of the carburettor/s dashpots and top up with one of the recommended S.A. E. 20 lubricants.
4. Check the level of the hydraulic brake fluid in the clutch and brake master cylinder reservoir and top up as necessary with Lockaeed Super heavy brake fluid.
5. Clean, and reoil the air cleaners on Cooper. models.
- Adjust the brakes, and on disc braked models inspect the friction pads for wear. Check the hoses and pipes for loose joints, or leaks or wear caused by the suspension or tyres rubbing against the flexible piping.
- Carefully inspect the rubber boots over the C. V. joints for splits or tears and renew as necessary.
- Check and adjust tyre pressures.
- Wash the bodywork and chromium fittings and clean out the interior.*
- Remove the sparking plugs, clean them, and adjust the electrode gaps.*
- Check that all the lights are functioning correctly and replace blown bulbs as necessary. *
- Lubricate with S.A.E.20 oil the door hinges, bonnet lock operating mechanism, and the safety catch.
- Lubricate the boot catch and hinges with an S. A. E. 20 oil.
- Check the battery cell specific gravity readings. and clean the terminals.
- Lubricate the dynamo rear bearing. NOTE. If wished this task need only be performed once every 6,000 miles, but once every 3,000 miles is to be preferred in the author’s experience.
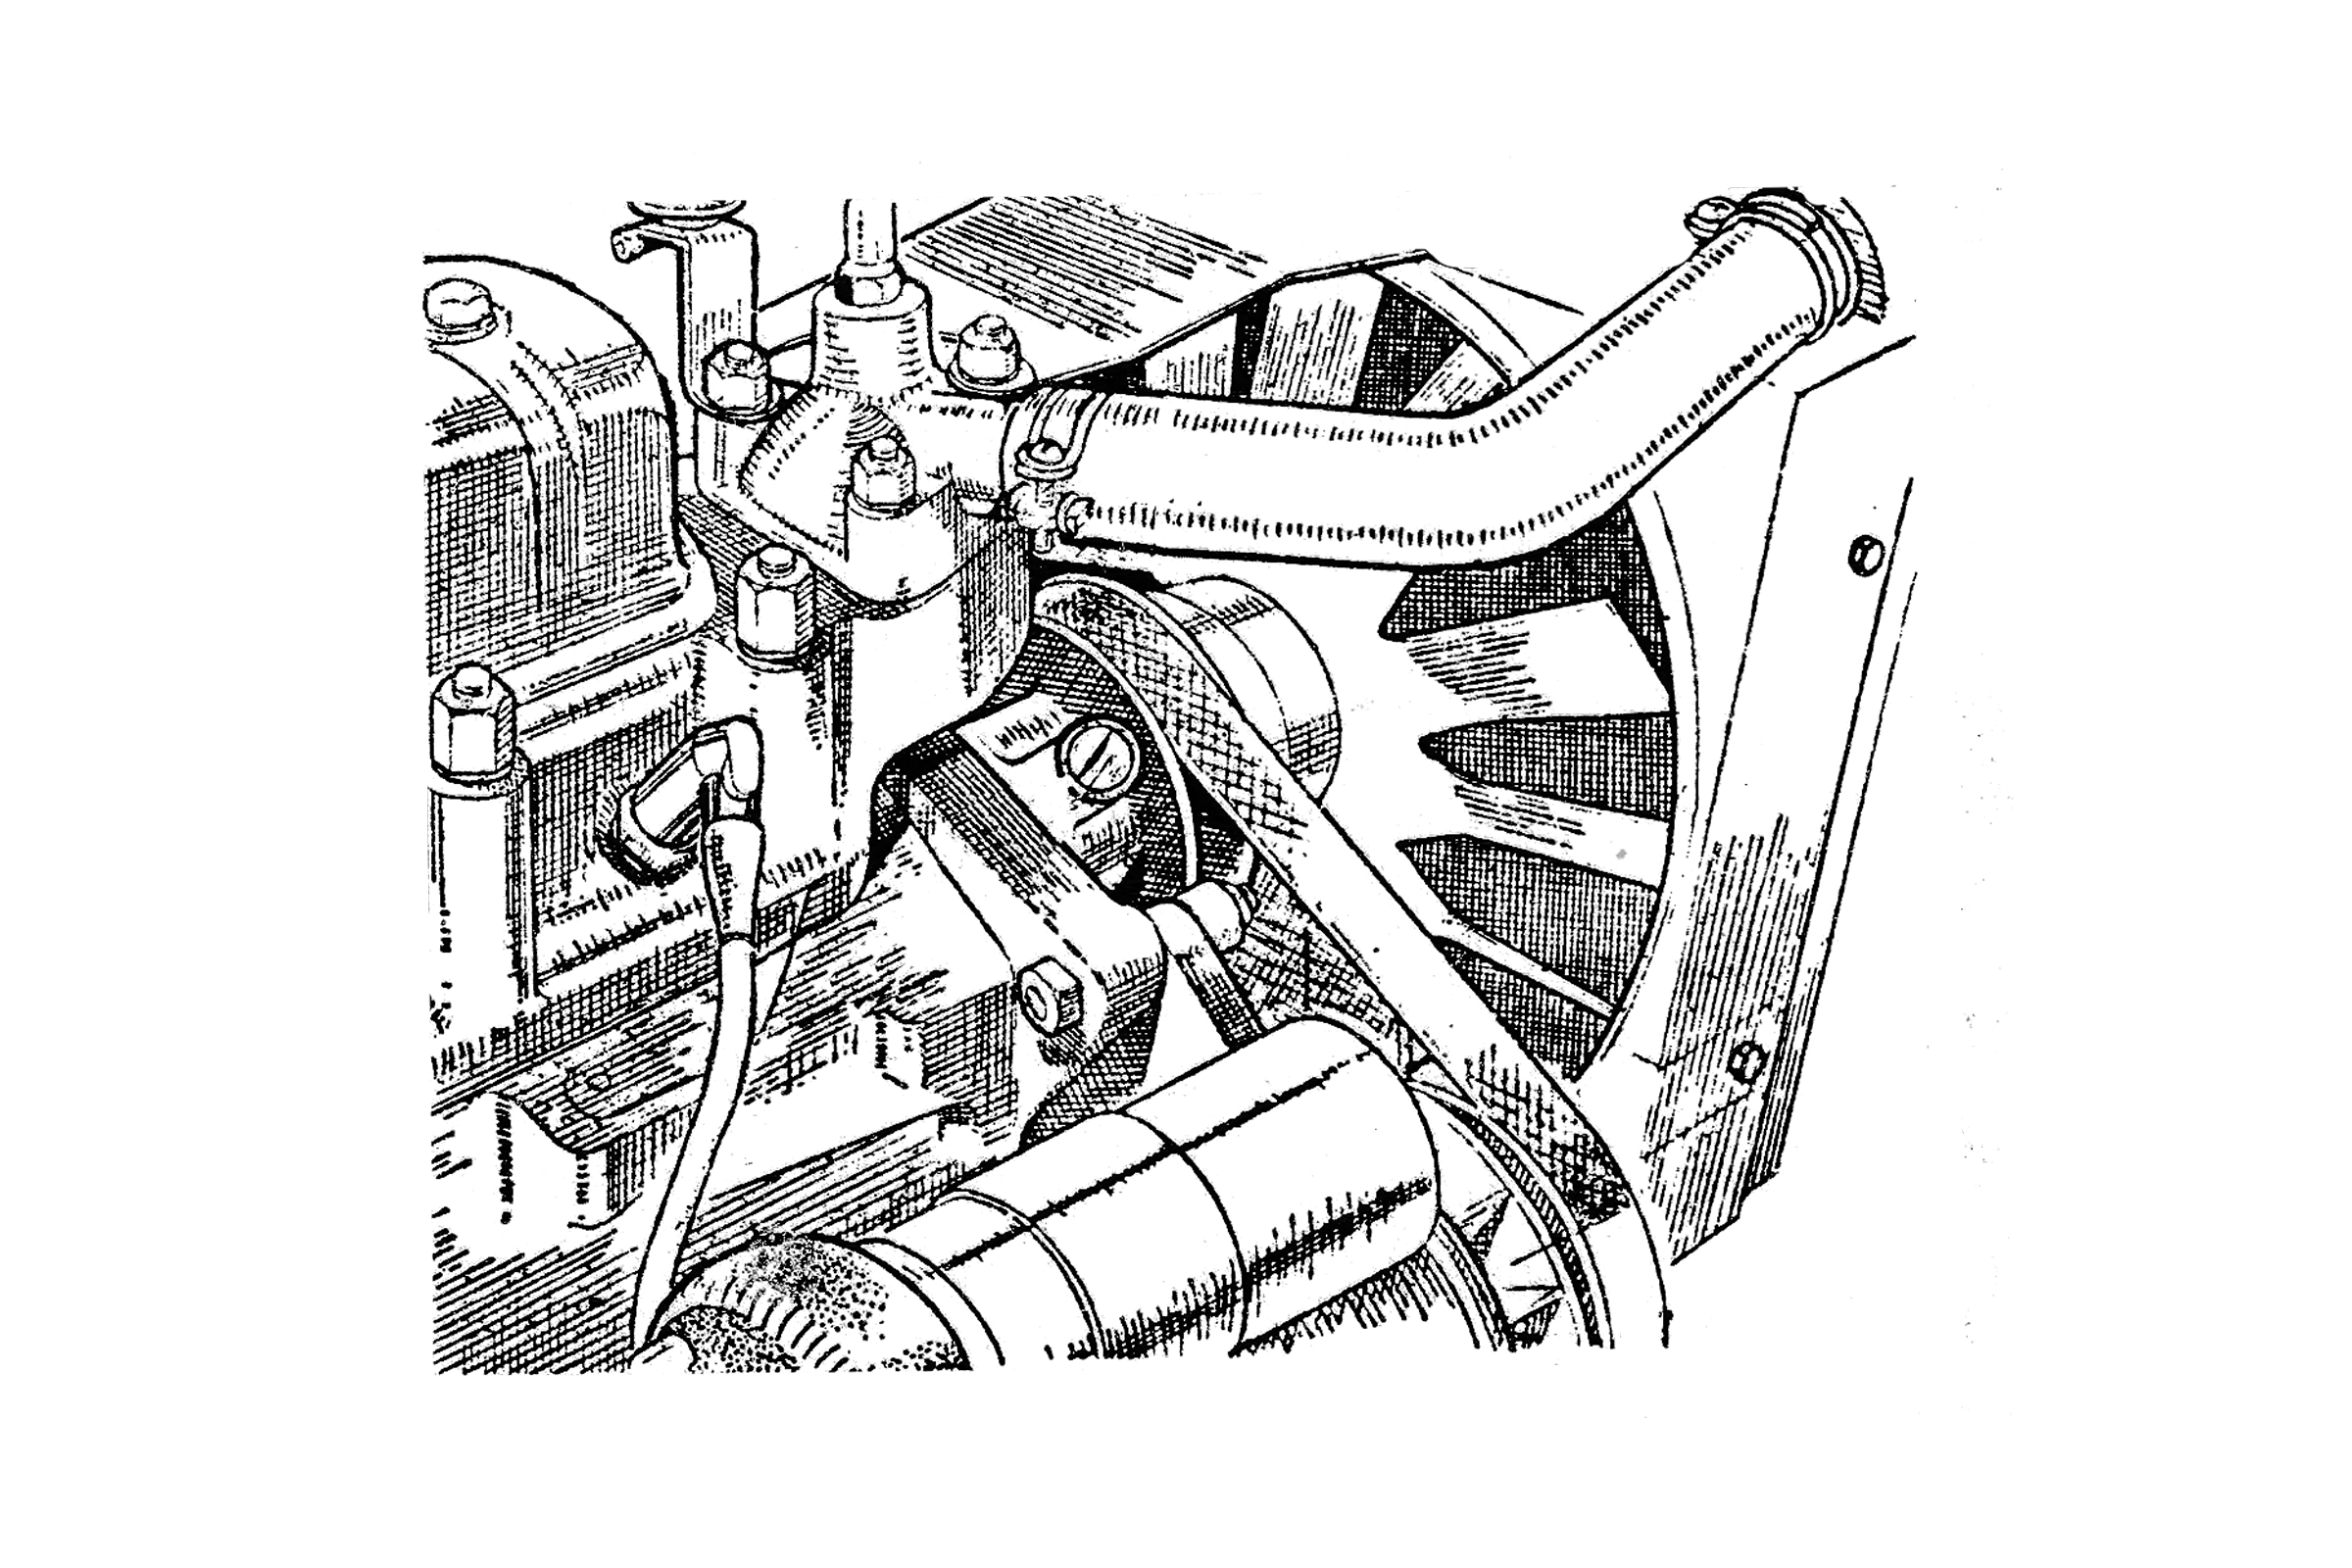
- Examine the fan belt and adjust as necessary.
- Check the clearance at the clutch return stop and adjust as necessary.
- Lubricate the carburettor controls with S. A. E. 20 oil
Every 6,000 miles
Perform all the maintenance tasks listed for the 3,000 mile service with the exception of item 3. See ‘2’ below.
- Turningto the S.U. carburettor/s, clean the suction chambers and pistons, and top up the piston dampers with a recommended S. A. E. 20 oil.
- Remove the oil filter, wash the bowl in petrol, and fit a new element and rubber seal. Refill the sump and filter with 81/2 pints of the recommended oil.
- Check the condition of the heater and cooling system hoses and replace as necessary.*
- Lubricate with engine oil the pivot point of the brake and clutch pedal shafts.*
- Check the fuel lines and the union joints for leaks and replace defective parts as necessary.*
- Remove and clean the filters in the carburettor/s and fuel pump where these are fitted.
- Check and adjust the valve rocker clearances.
- Adjust the brakes, and on disc braked models inspect the friction pads for wear. Check the hoses and pipes for loose joints, or leaks or wear caused by the suspension or tyres rubbing against the flexible piping.
- Carefully inspect the rubber boots over the C. V. joints for splits or tears and renew as necessary.
- Check and adjust tyre pressures.
- Wash the bodywork and chromium fittings and clean out the interior.*
- Remove the sparking plugs, clean them, and adjust the electrode gaps.*
- Check that all the lights are functioning correctly and replace blown bulbs as necessary. *
- Lubricate with S.A.E.20 oil the door hinges, bonnet lock operating mechanism, and the safety catch.
- Lubricate the boot catch and hinges with an S. A. E. 20 oil.
- Check the battery cell specific gravity readings. and clean the terminals.
- Lubricate the dynamo rear bearing. NOTE. If wished this task need only be performed once every 6,000 miles, but once every 3,000 miles is to be preferred in the author’s experience.
- Examine the fan belt and adjust as necessary.
- Check the clearance at the clutch return stop and adjust as necessary.
- Lubricate the carburettor controls with S. A. E. 20 oil.
- Turningto the S.U. carburettor/s, clean the suction chambers and pistons, and top up the piston dampers with a recommended S. A. E. 20 oil.
- Remove the oil filter, wash the bowl in petrol, and fit a new element and rubber seal. Refill the sump and filter with 81/2 pints of the recommended oil.
- Check the condition of the heater and cooling system hoses and replace as necessary.*
- Lubricate with engine oil the pivot point of the brake and clutch pedal shafts.*
- Check the fuel lines and the union joints for leaks and replace defective parts as necessary.*
- Remove and clean the filters in the carburettor/s and fuel pump where these are fitted.
- Check and adjust the valve rocker clearances.
- Check and if necessary tighten the door hinges and the striker plate securing screws.
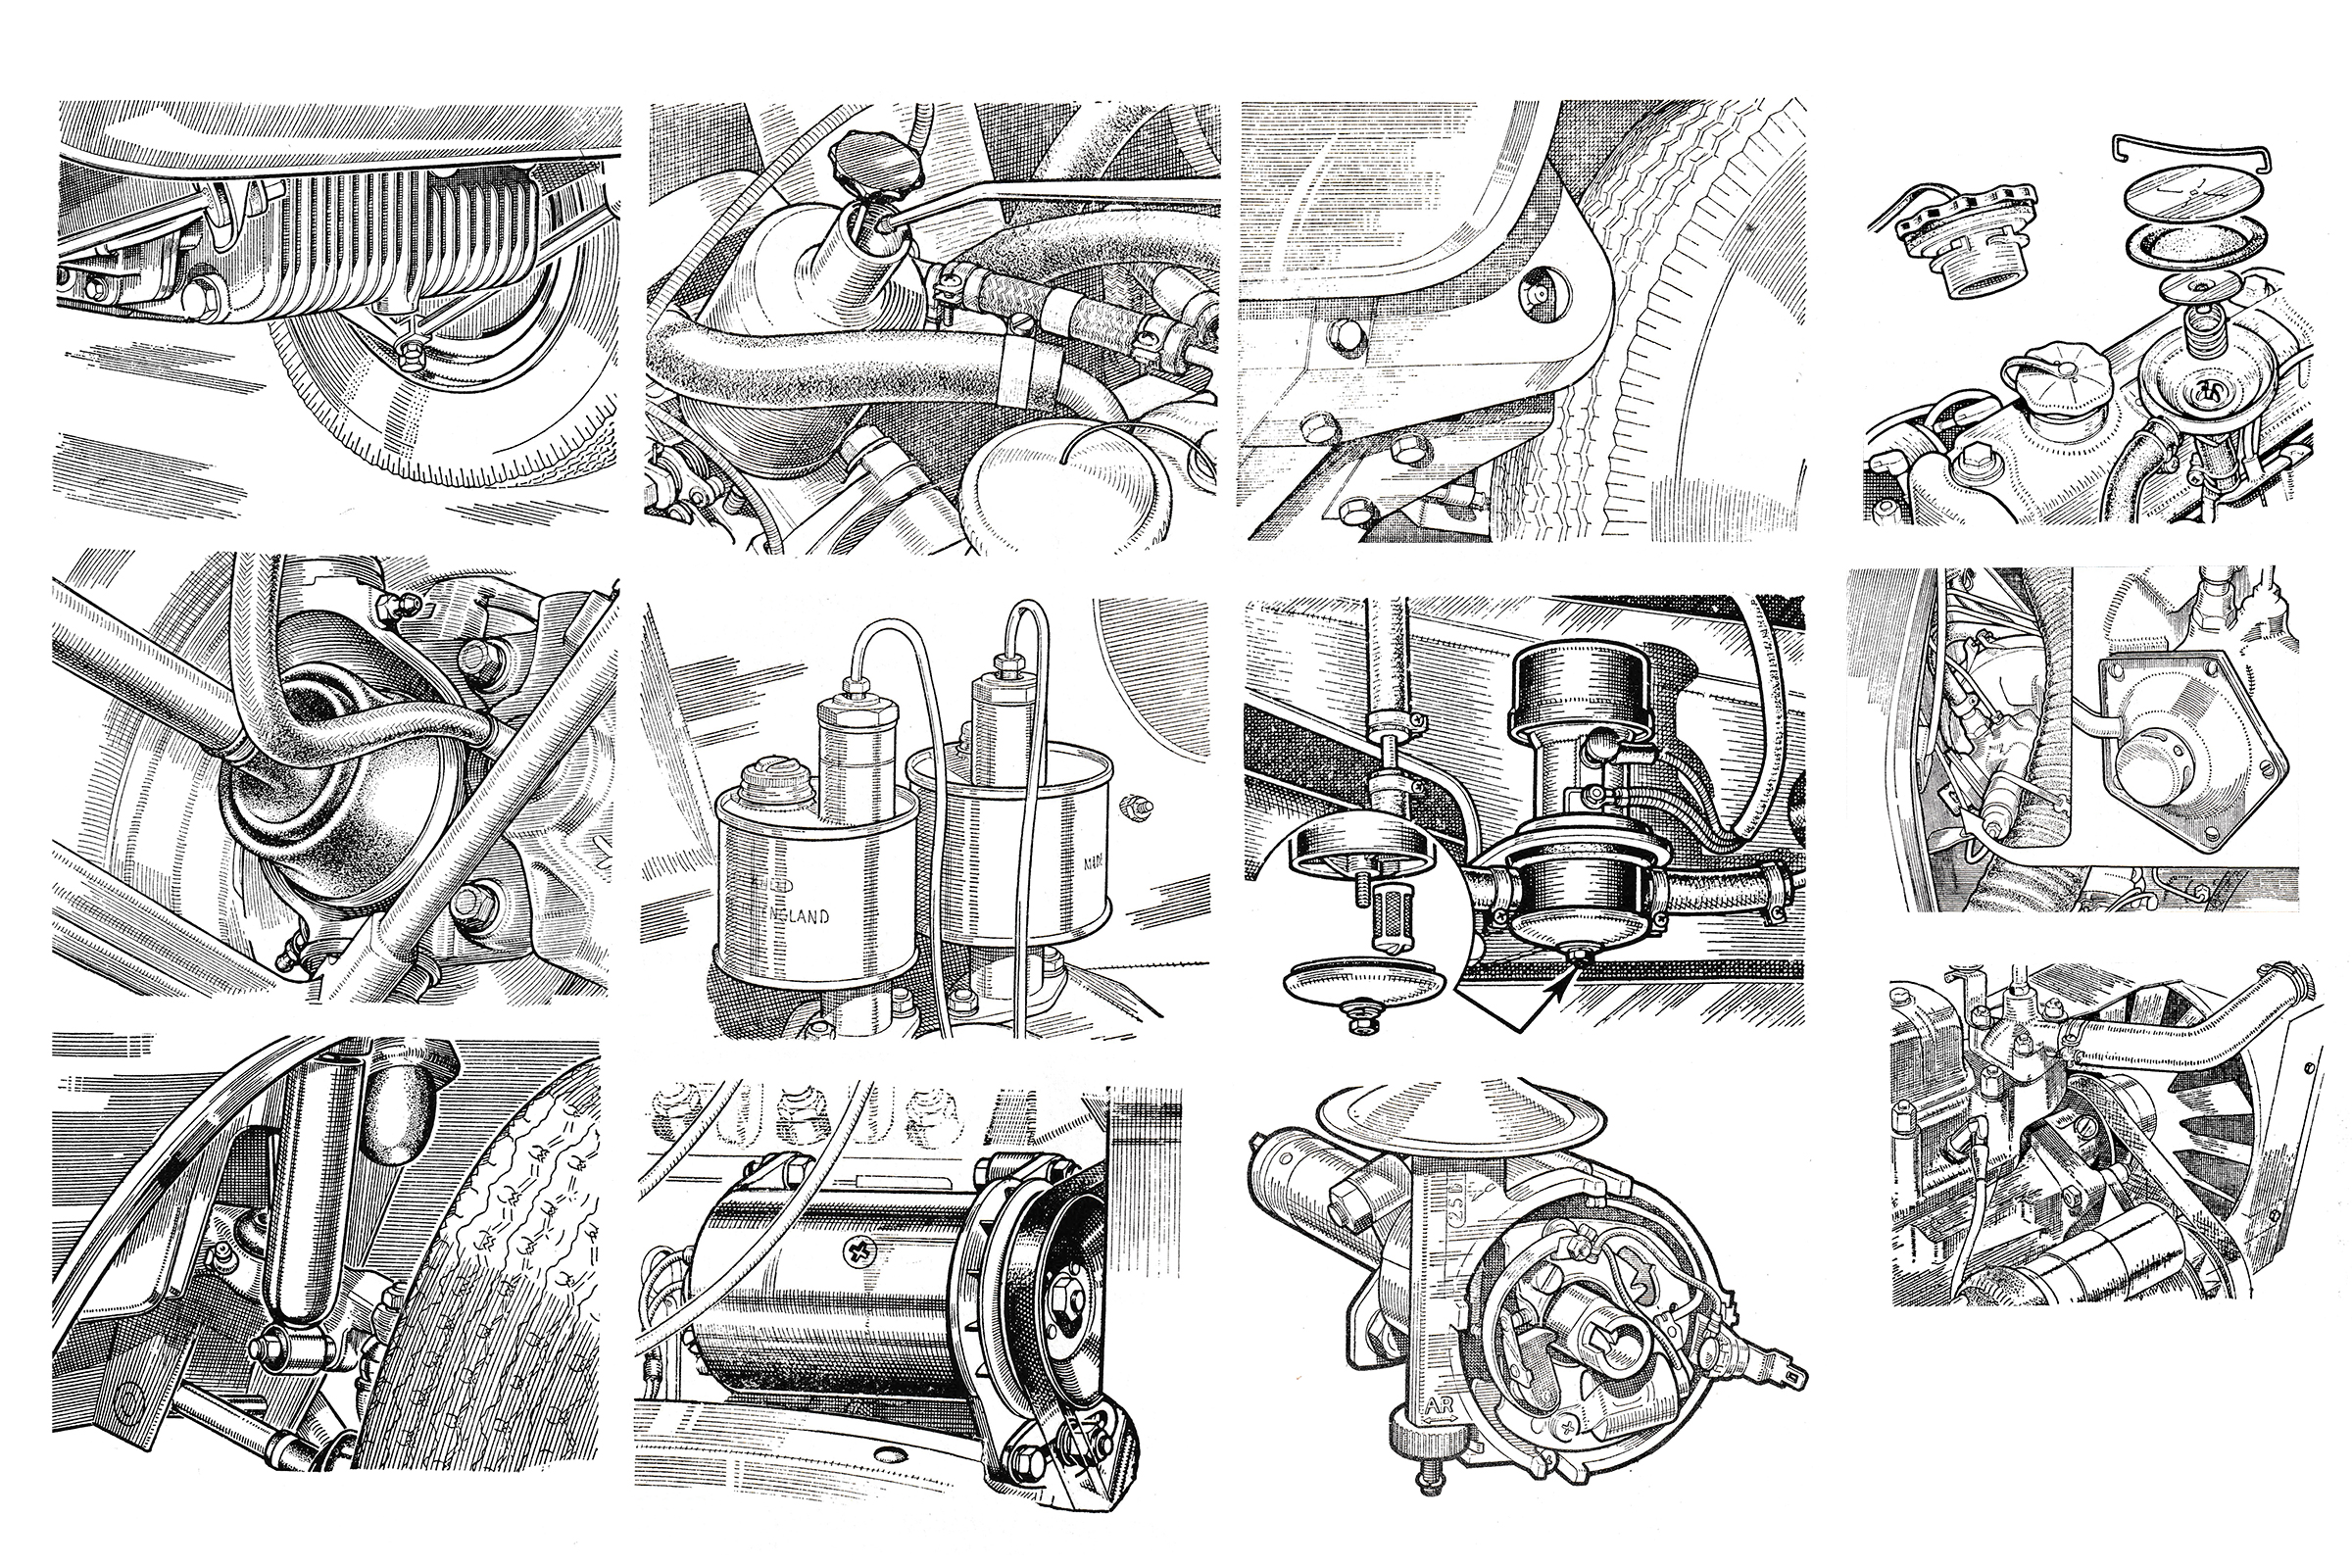
- Repack the rear hub bearings with grease. To do this take off each hub cap and then prise away the grease retaining cap in the centre of the hub. Wipe away all traces of old grease and then fill the cap with fresh Castrolease L.M. or similar. Any excess will be forced out of the small hole in the centre of the cap and can be wiped away when the cap is replaced.
- Remove the distributor cap, pull off the rotor arm and apply three drops of engine oil to the head of the large screw in the centre of the distributor.
- Allow three drops of oil past the cam to the automatic timing mechanism.
- Lubricate the four sided cam by smearing a faint trace of grease over it.
- Apply a tiny spot of oil to the moving contact breaker pivot pin. Any excess might get on the points and cause mis-firing.
- Check the condition of the contact breaker points, clean and re-gap them, and if necessary, fit a new set and check the timing and advance and retard mechanism.
- Adjust the carburettor slow running and tune if necessary.
- Examine the exhaust system for holes and leaks and replace defective components as necessary.
- Wax polish the body and also the chromium plating. Force wax polish into any joins in the bodywork to help prevent rust forming.
- Balance the front wheels to eliminate steering vibration as necessary.
- Check and adjust the steering ‘toe-in’ of the front wheels.
- Check the hydraulic damper mounting nuts, the suspension nuts and the steering nuts for tightness.
- If wished, change over the tyres to equalise wear and inspect the walls for damage.
Every 12,000 Miles
In addition to the maintenance tasks previously listed carry out the following operations.
- Remove the carburettor float chamber, empty any sediment present, check the condition of the needle valve, clean and refit.
- Remove the speedometer cable, clean and lightly lubricate the inner cable with Castrolease L.M. or similar. When reassembling the inner cable should be withdrawn approximately 8 inches and the surface grease wiped off. This is so none will work its way into the speedometer head.
- Steam clean the underside of the body and clean the engine and engine compartment.
- Remove the sparking plugs , and fit new ones, correctly gapped.
- Inspect the ignition leads for cracks and perishing and replace as necessary.*
- Remove the brake drums, blow out the dust, and inspect the linings for wear.
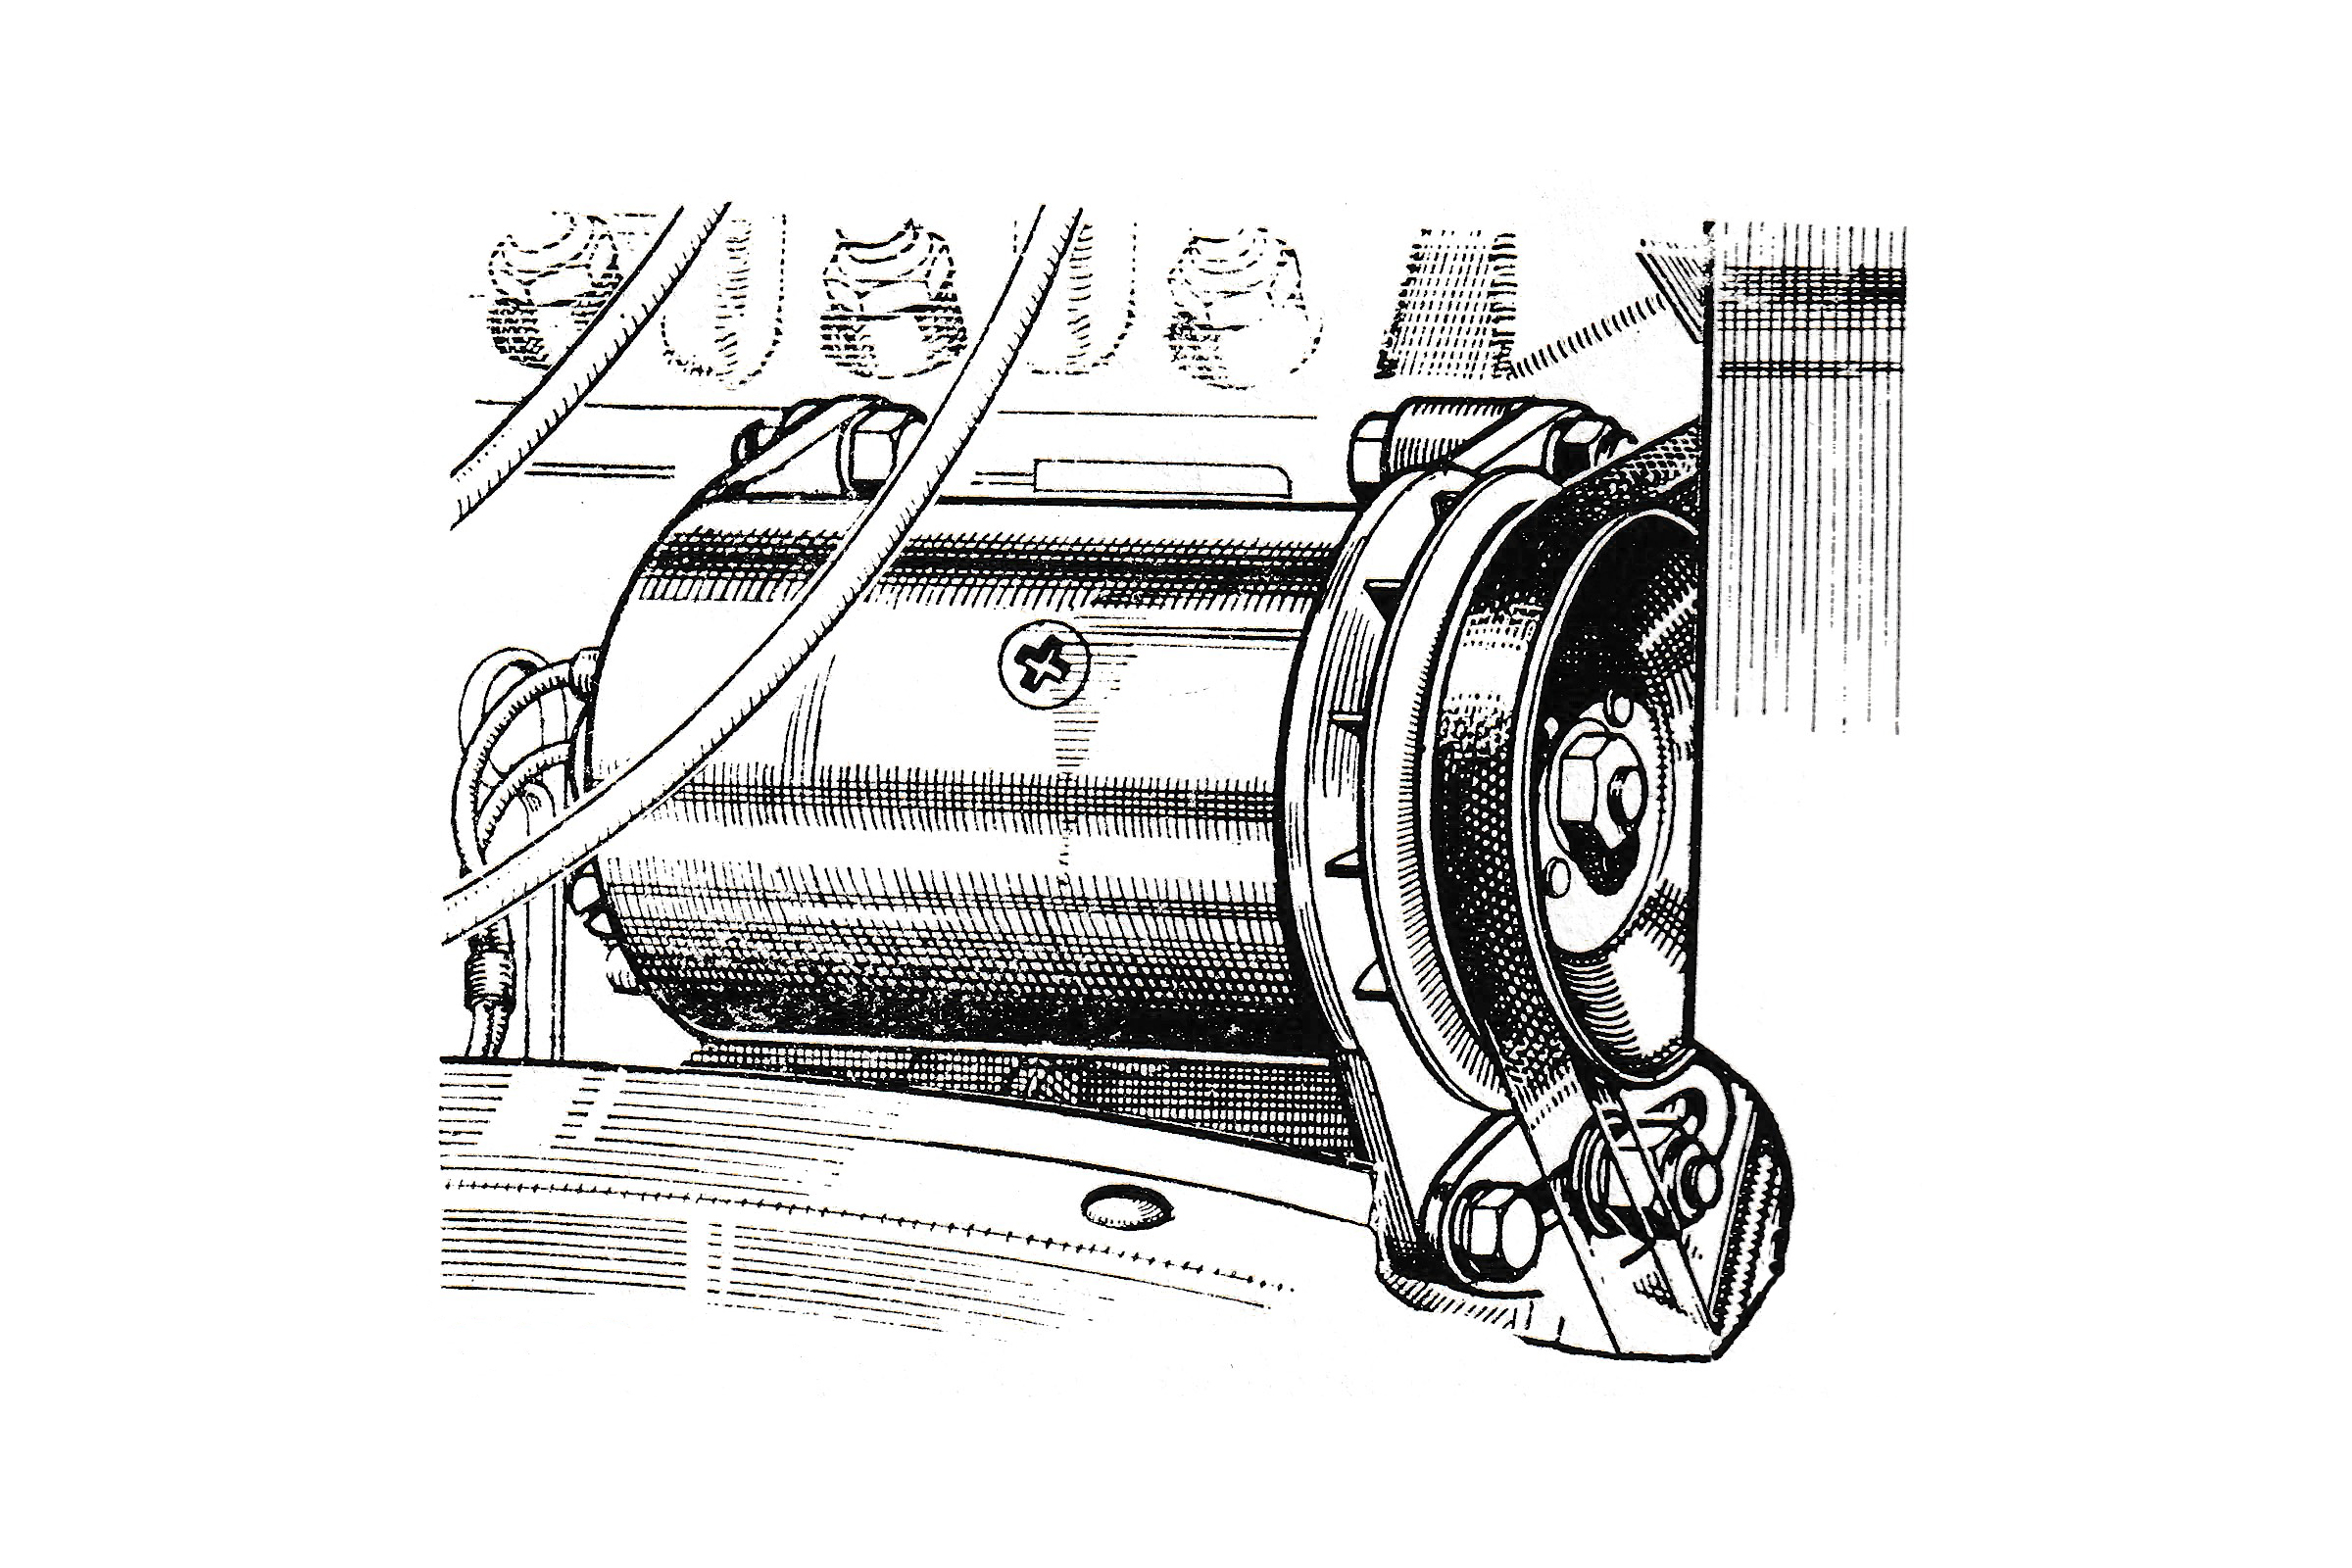
- Examine the dynamo brushes , replace them if worn, and clean the commutator.
- Renew the windscreen wiper blades.*
- Check the headlamp bulbs and renew them if slightly blackened or if the element sags.
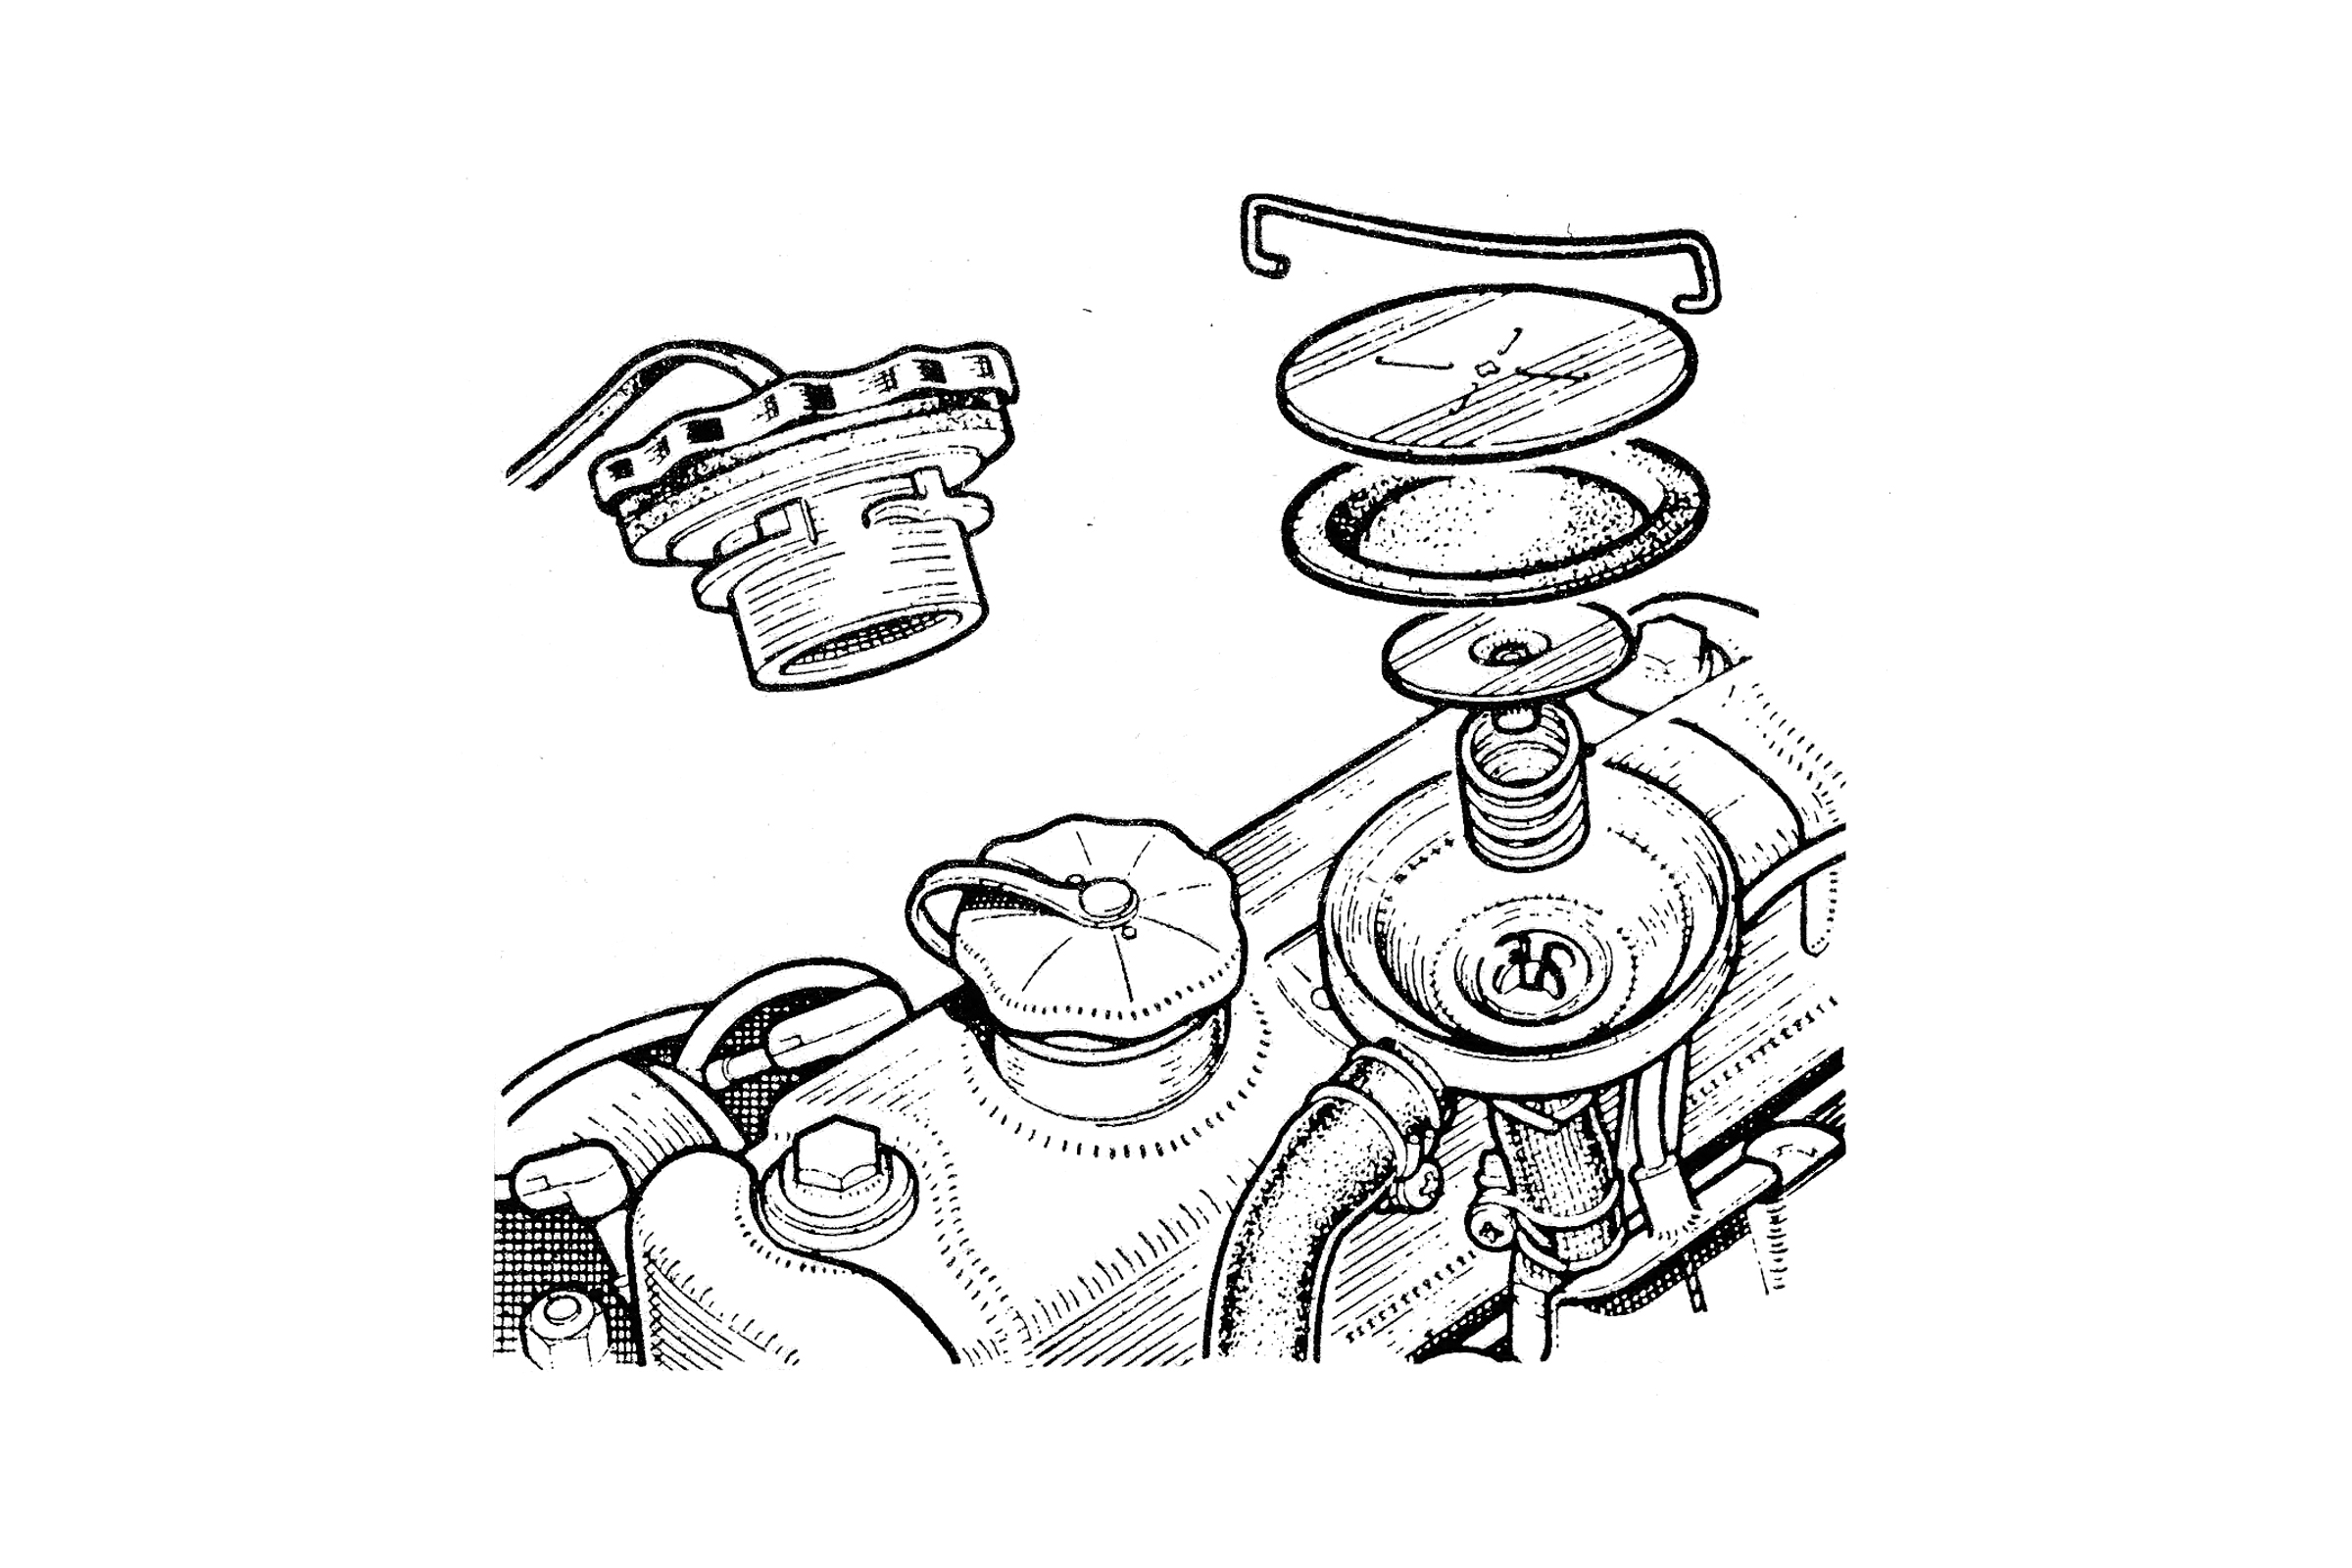
- On later models fitted with a crankcase closed circuit breathing system, change the engine oil filler cap and clean the crankcase breather valve. All the metal parts can be washed in petrol. The diaphragm should be cleaned with detergent or methylated spirits.
- Spring clip
- Cover
- Diaphragm
- Metering needle
- Spring
- Cruciform guides.
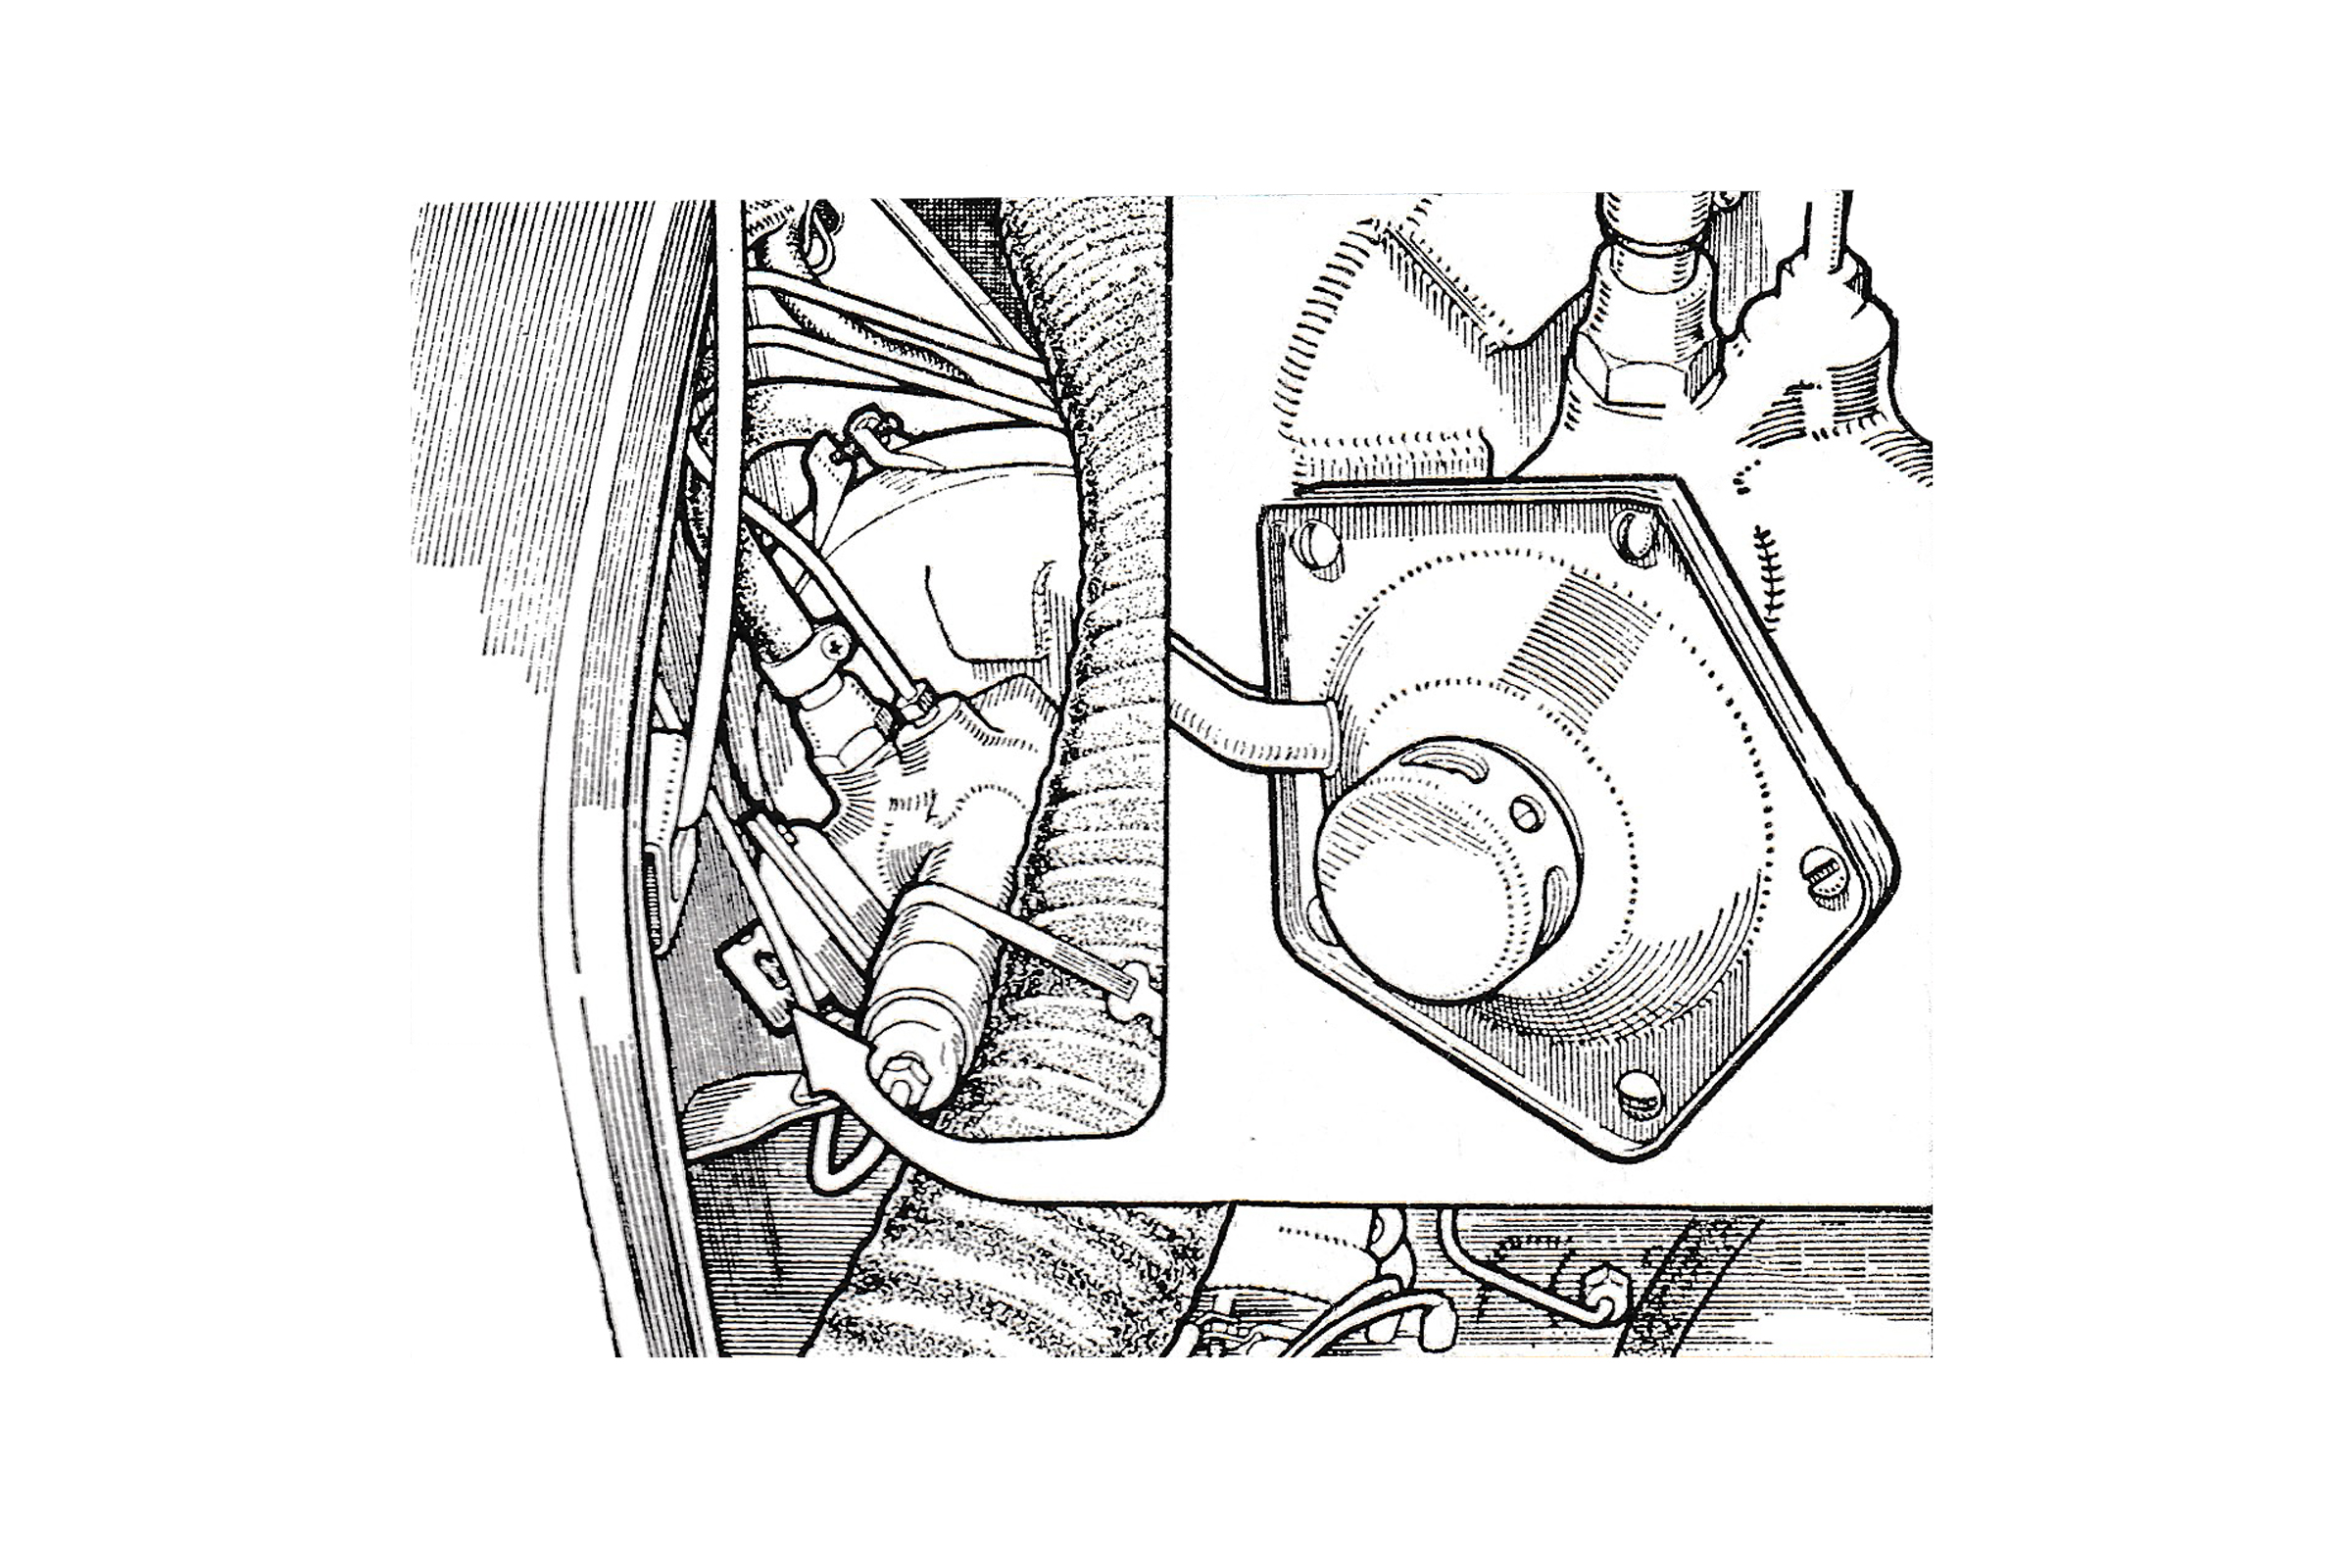
- Remove the five screws holding the vacuum servo air valve cover in position and gently blow out with a low pressure air line (foot pump will do) the filter chamber.
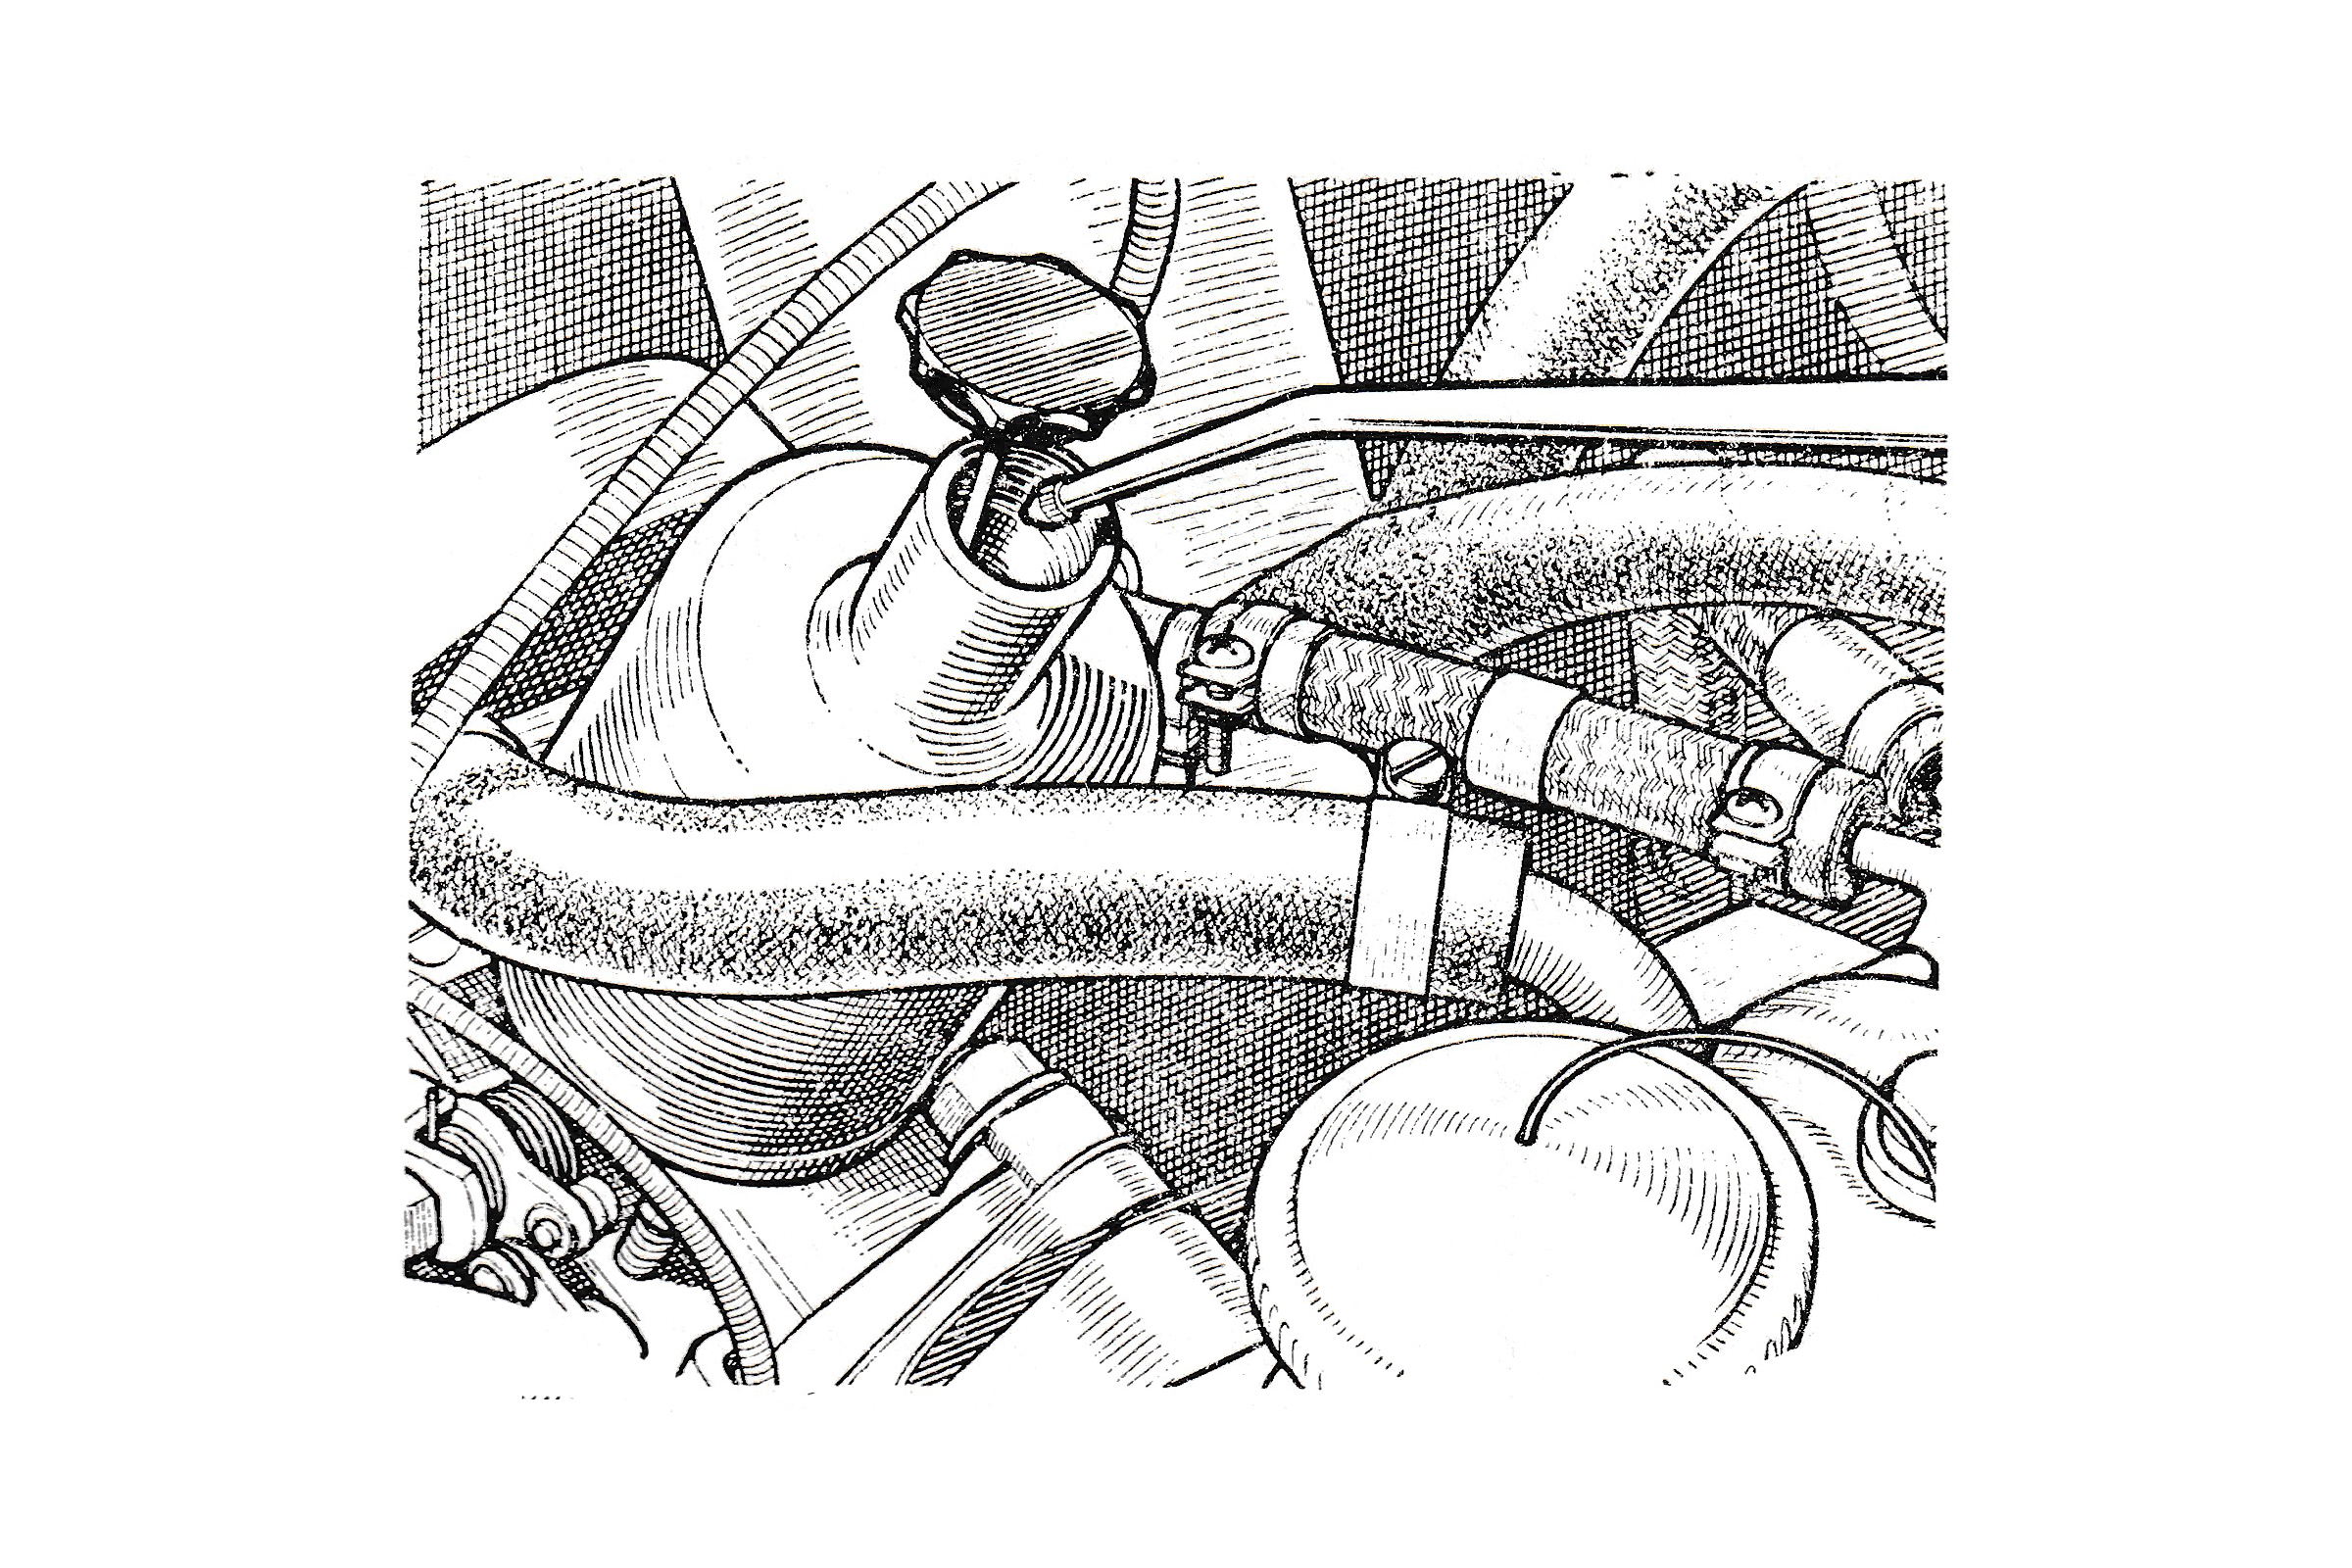
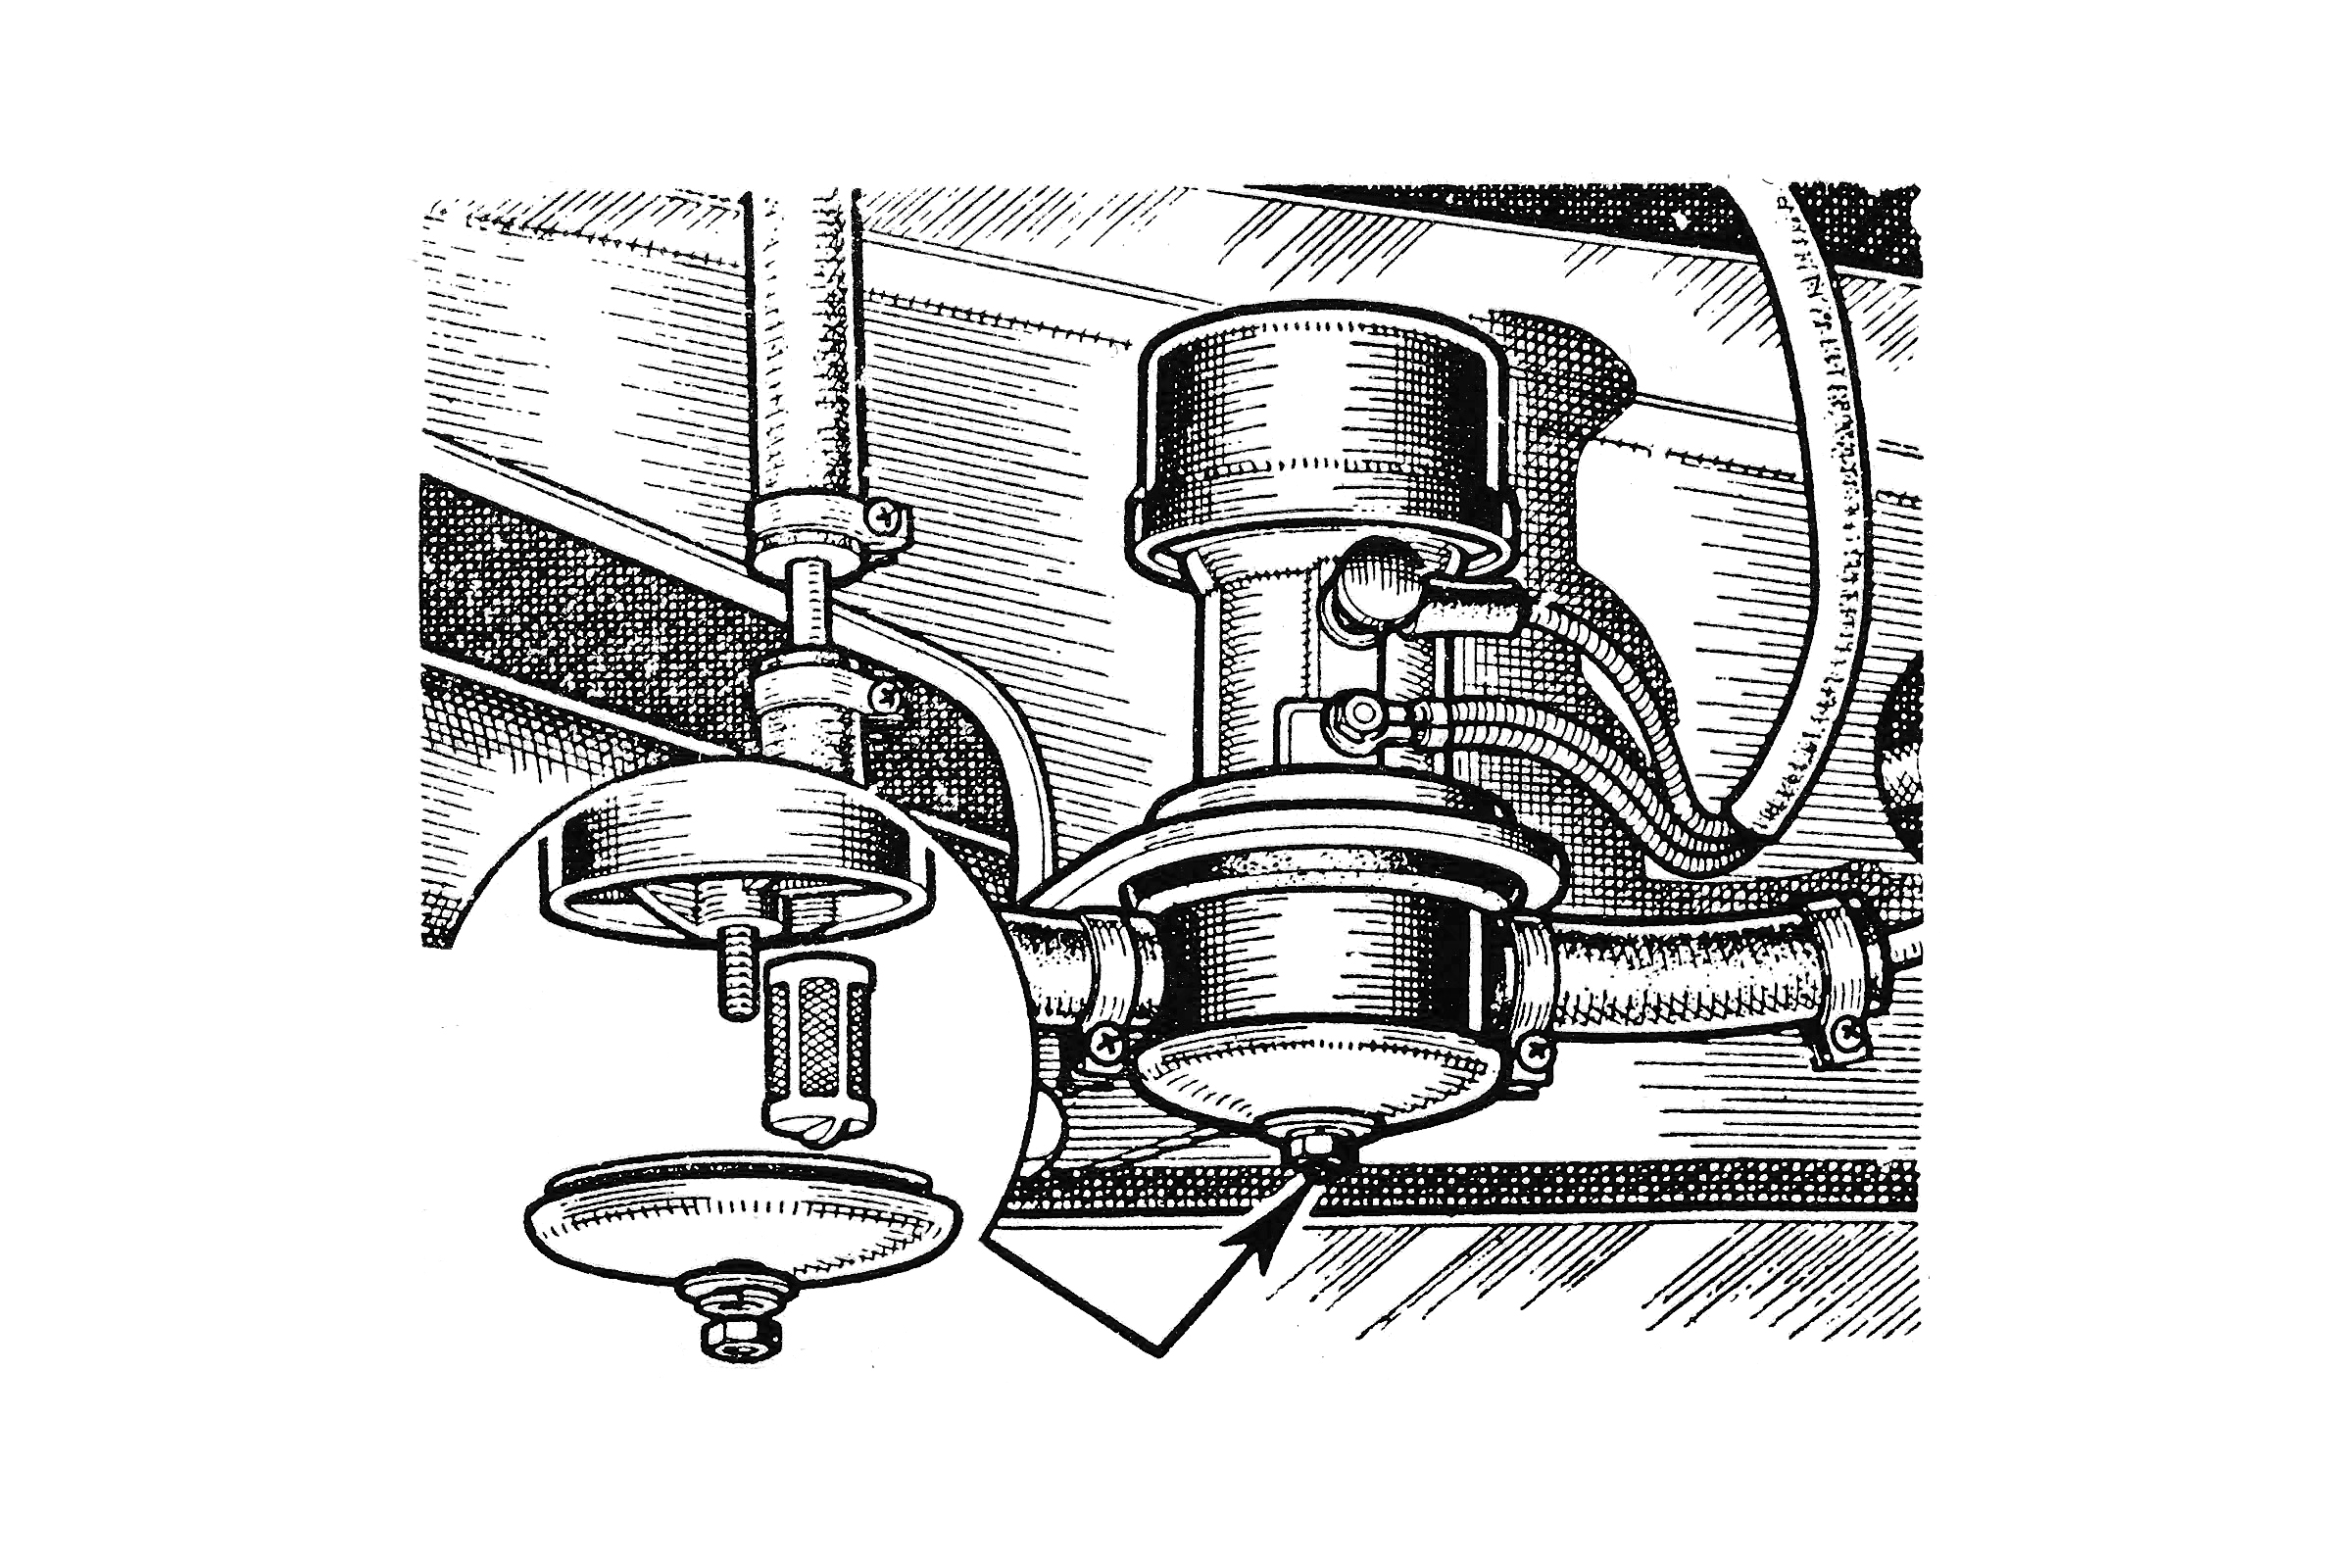
- Lubricate the water pump. To do this unscrew the oiling plug just behind the pulley wheel and grease sparingly with Castrolease L. M. Replace the plug. If the pump squeaks a few teaspoonfuls of hydraulic fluid in the cooling system will silence the carbon sealing ring.
Every 24,000 Miles
In addition to the maintenance tasks listed previously carry out the following operations:-
- Check and adjust any loose play in the rack and pinion steering gear.
- Examine the ball joints and hub bearings for wear and replace as necessary.
- Examine the inner ‘rubber’ universal joints for wear and renew as necessary.
- Check the tightness of the battery earth lead on the bodywork.
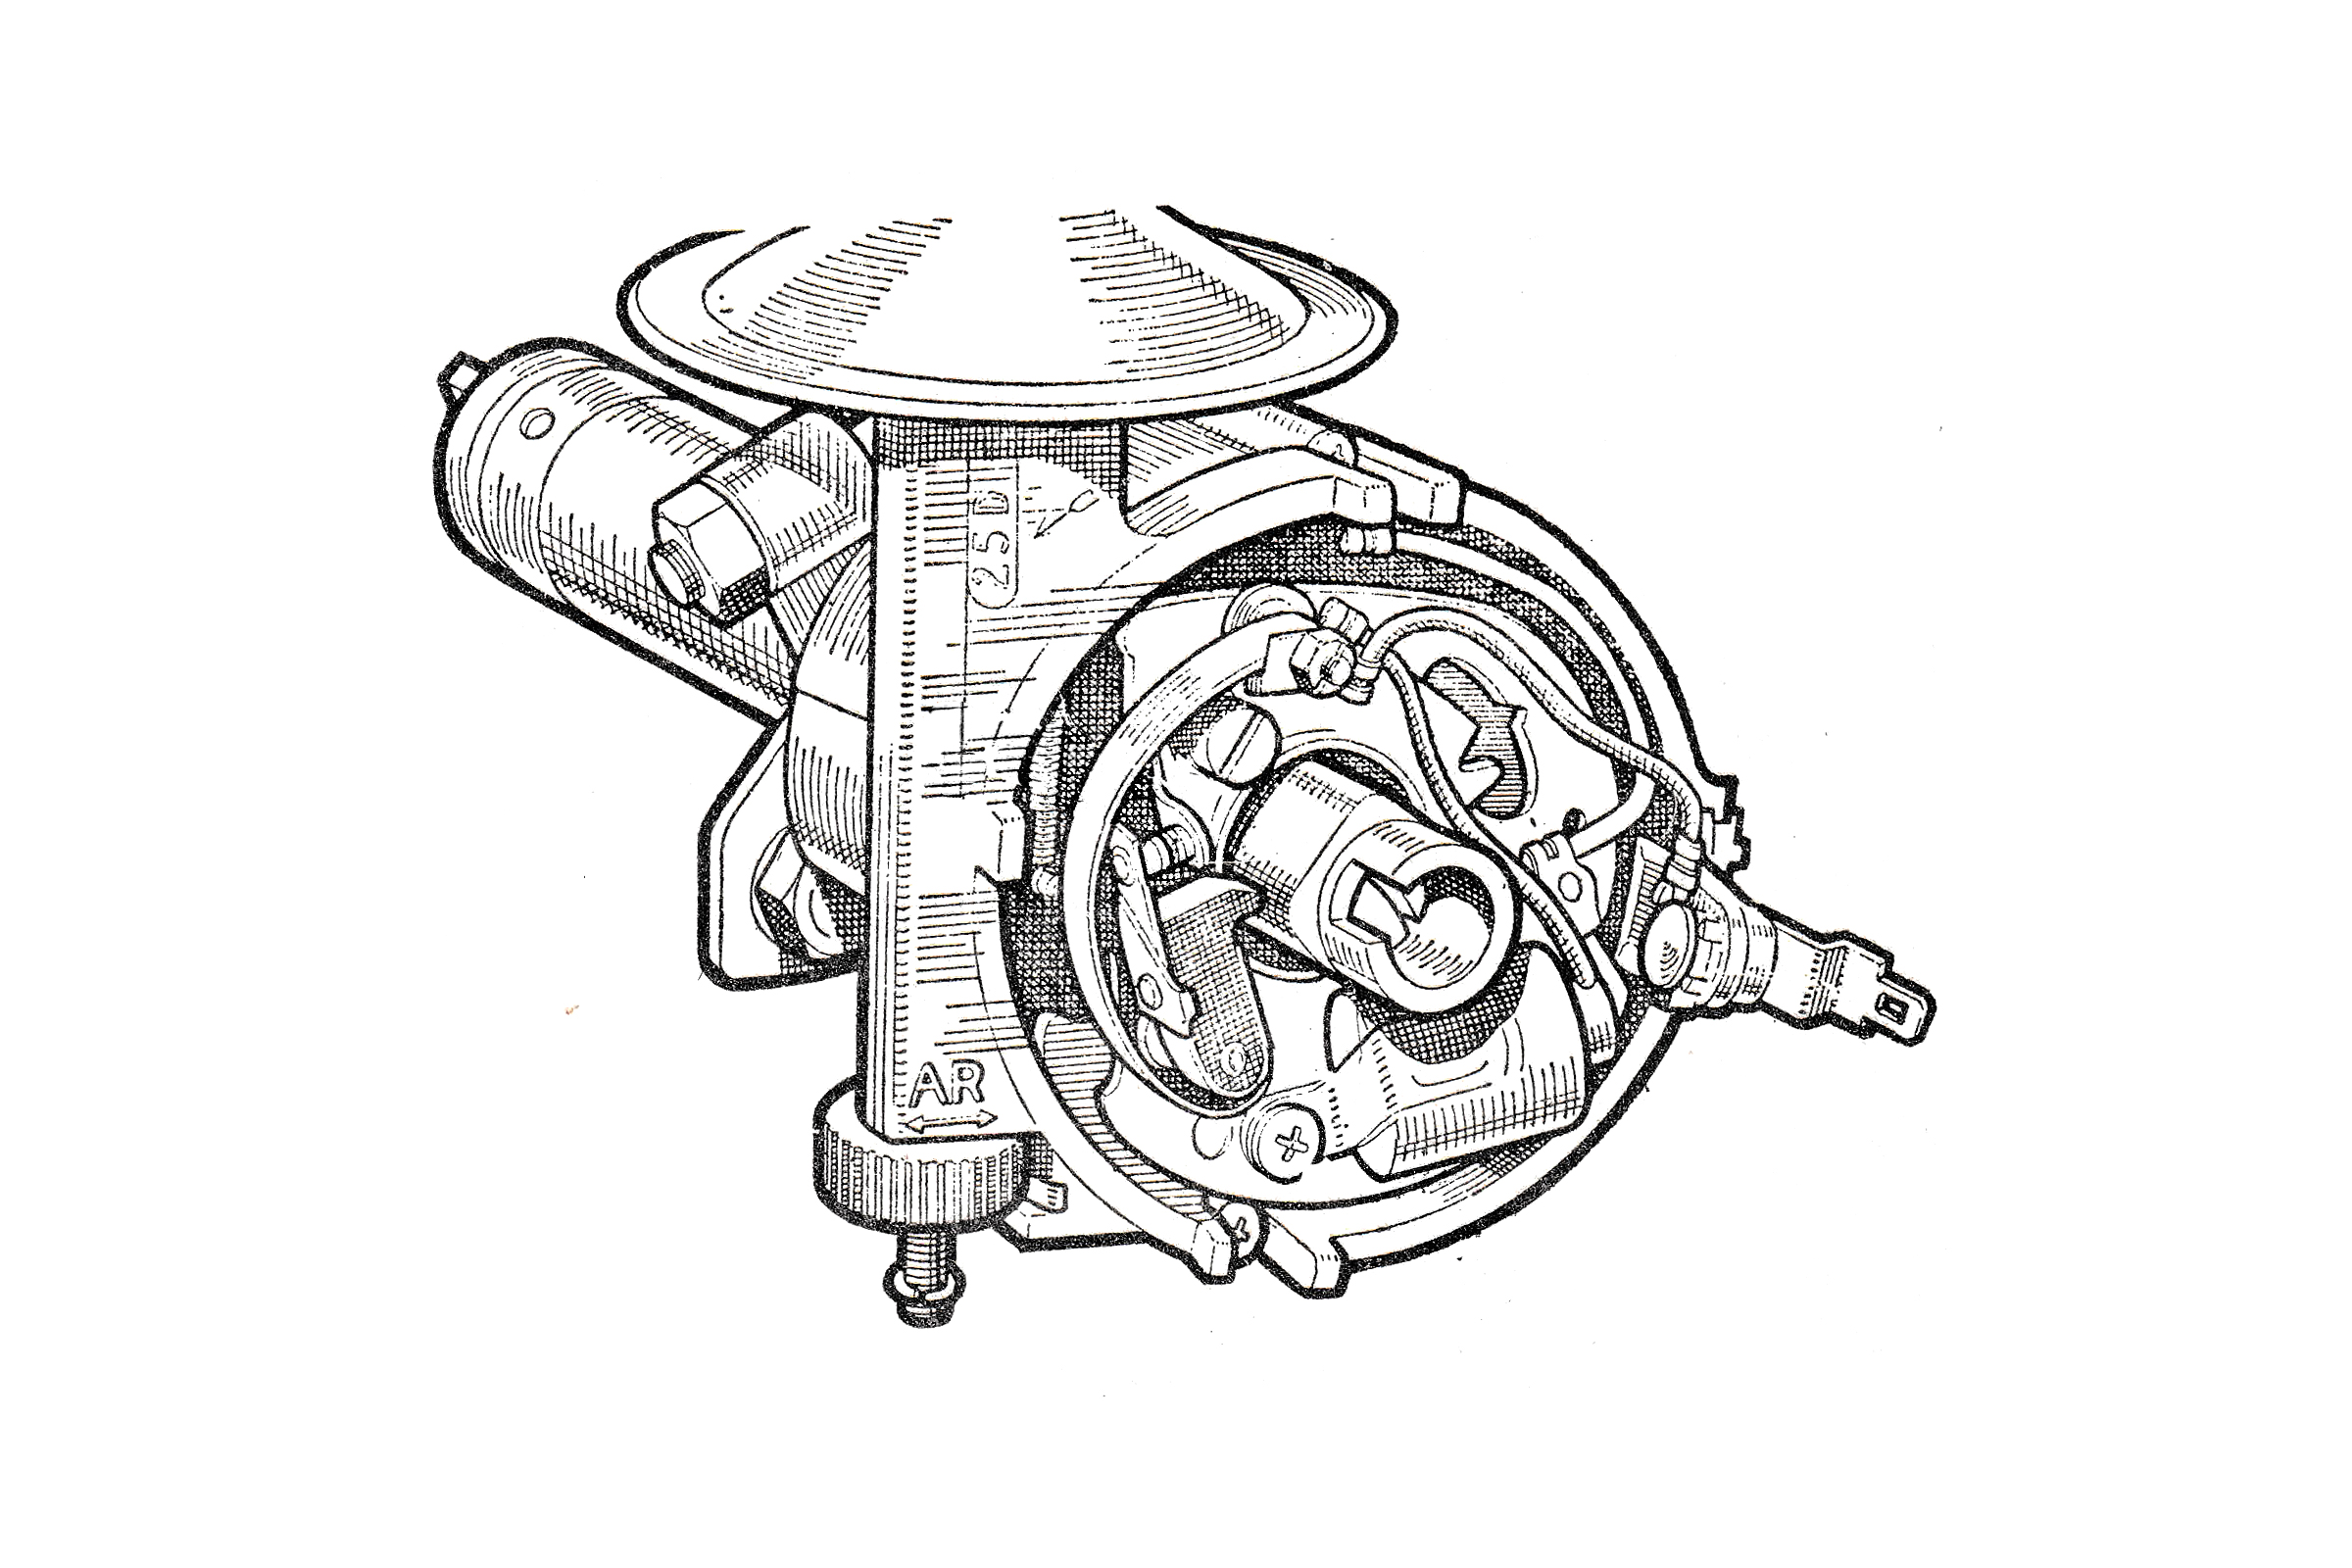
- Renew the condenser in the distributor. See page 83 for details.
- Remove the starter motor, examine the brushes, replace as necessary and clean the commutator and starter drive. Please see page 149 for details.
- Test the cylinder compressions, and if necessary remove the cylinder head, decarbonise, grind the valves and fit new valve springs.
Every 40,000 Miles
- Drain the brake fluid from the hydraulic system. Renew all the rubber seals and flexible hoses. Examine the brake pistons and their bores for scratches and renew as necessary. Refill the system and bleed the brakes.